
Heightfields for rendering terrain and water. Choose one type for your project.
Introduction
In heightfield rendering, we have a texture with height values (the terrain project) or a function where we procedurally can compute a height (the water project). The method for both height field projects are the same, but we will here describe terrain project, and just describe the procedural part for the water in the end of the section. Choose either terrain or procedural water as project. If you like, you can implement the other heightfield with minor modifications at the end.
In this project, we will generate a flat triangle mesh in a vertex array object (see tutorial 1 and 2). At rendering, we offset the vertex position in the world up direction by sampling the heightfield texture (or procedurally compute the water height) in the vertex shader.

- Generate mesh with $N$ triangle edges per side. (once)
- Make draw call for flat mesh.
- In vertex shader
- Sample heightfield texture
- Offset vertex in world-up direction
- Compute normal from heightfield.
- Shade as usual, but fetch diffuse color from aerial photo.
The mesh
 We will separate much of the code for the project into a separate file:
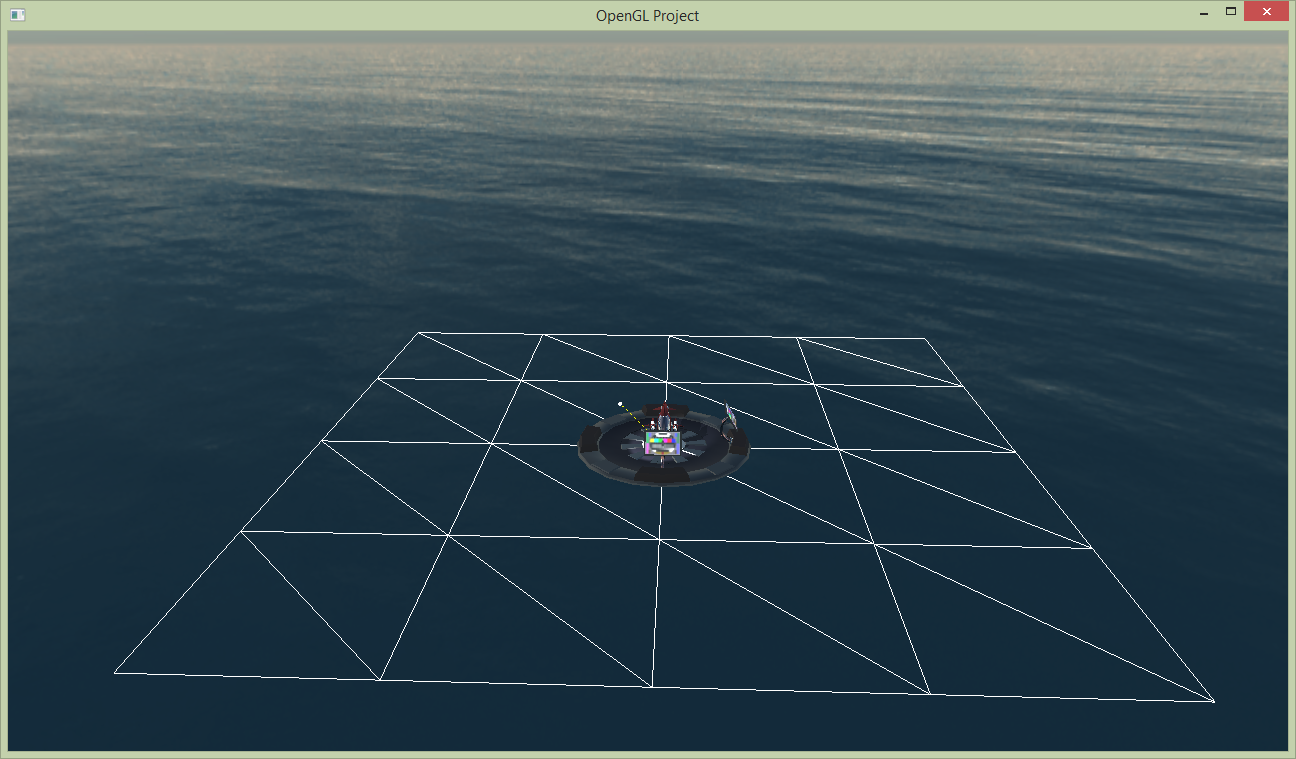
 heightfield.cpp. In generateMesh(int tesselation), we set up the vertex array object of a flat mesh with $y=0$ and $x,z\in[-1, +1]$, and texture coordinates in $[0, 1]^2$. The number of triangles per side is determined by tesselation and should not be hardcoded (see example with 4 triangle edges per mesh side in the image to the right). You may choose if you want a plain array of triangles (glDrawArrays(GL_TRIANGLES, ...)) or an indexed. You may also choose if you want to use a triangle strip format (e.g., glDrawElements(GL_TRIANGLE_STRIP, ...)). If you go with a triangle strip, each "row/column" can be a strip, and the strip can be restarted with a special index in the index list:
glEnable(GL_PRIMITIVE_RESTART);
glPrimitiveRestartIndex(UINT32_MAX);
HeightField terrain;initGL;terrain.generateMesh(1024);HeightField::submitTriangles(void) to make the draw call for the generated mesh.
The vertex shader
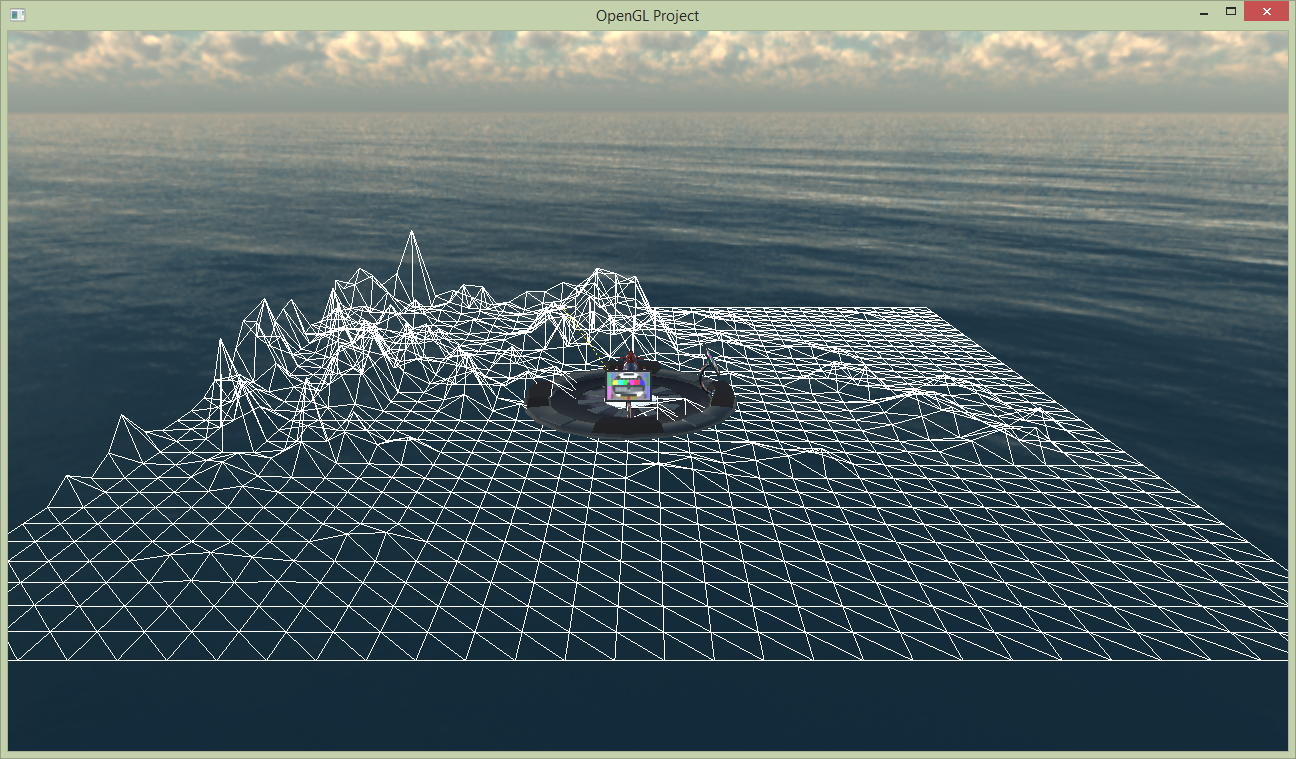
We are going to first test our mesh by calling terrain.submitTriangles() in display(). Make a new shader program from heightfield.vert and heightfield.frag. The vertex shader looks similar to shading.vert but the fragment shader can be much simpler for now. Start with just outputting a white fragment color. Set a model matrix that scales the flat mesh to an appropriate size, and render the mesh to verify that it looks good. It can be easier to render it as a wireframe by setting the polygon mode to lines before the drawcall:
glPolygonMode(GL_FRONT_AND_BACK, GL_LINE);glPolygonMode(GL_FRONT_AND_BACK, GL_FILL);
Next, load the height field image and the aerial photo in init() by calling:
terrain.loadHeightField("../scenes/nlsFinland/L3123F.png");
terrain.loadDiffuseTexture("../scenes/nlsFinland/L3123F_downscaled.jpg");waterHeight() function from Appendix (below).
Shading
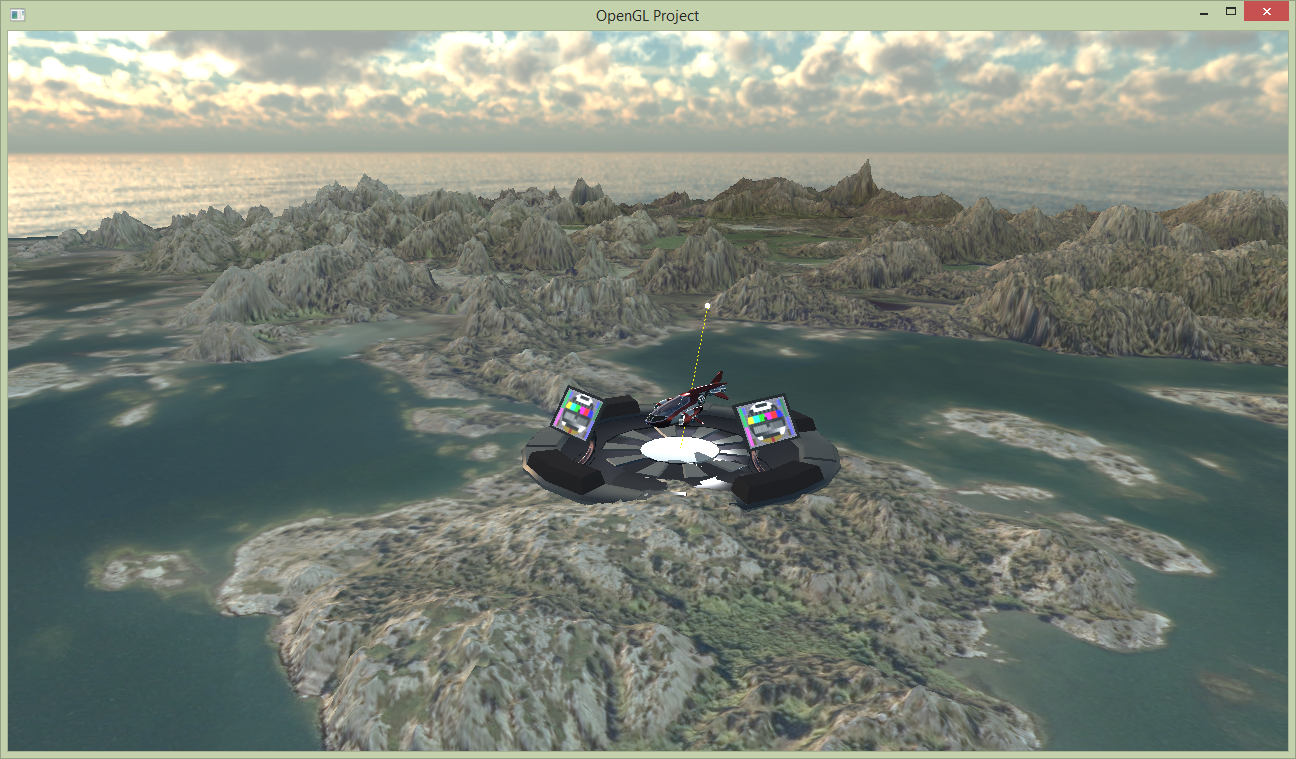
First, in the fragment shader, just sample the aerial photo (with the texture coordinates) and use as output color. This look already rather good, but it looks very different than the shading of the landing pad and ship, since totally different light sources are used. To compute the shading according to our shading model, we need to cheat a little. We will use the aerial photo as a diffuse texture, but compute the shading from our environment map. Reuse the shading.frag also for the heightfield shader program. We need to provide all the inputs to this shader, so we need to compute a normal. Figure out a way to compute a world space normal from the height field (Hint: you can sample a few points and estimate the gradient/slope in $u$ and $v$). Transform the world space normal to view space and pass it to the fragment shader. The final result should look similar to the image at the start of this section.
When done, show your result to one of the assistants. Have the finished program running and be prepared to explain what you have done.
Appendix
Details about terrain data
We have downloaded an ortho photo and height map data from National Land Survey of Finland: download service in November 2016. We have converted the images to formats supported by stb_image. The ortho photo was converted from JPEG2000 to JPEG with ImageMagick and then down scaled to decrease memory consumption in the repository. The heightmap was converted from GeoTIFF to 16-bit grayscale PNG with GDAL with the following command:
gdal_translate -ot Int16 -of PNG -scale 0 4096 0 32767 -co worldfile=no L3123F.tif L3123F.pngDetails about procedural water
Instead of sampling the height from a texture, we compute it with a function waterHeight(). First, try something simple, like a sine wave that depend on the position (uv and currentTime. Try to improve the height function, and also try the one we provide:
float waterHeight(float currentTime, vec2 uv)
{
	uv *= 50.0;

	//wave directions (not normalized)
	vec3 waveDir1 = vec3(1.0 / 1.5, 0.0, 1.0 / 8.0);
	vec2 waveDir2 = vec2(1.0 / 5.33, 0.911 / 5.33);
	vec2 waveDir3 = vec2(-1.0 / 1.79, 0.0);

	float f = 1.8 * fbm(currentTime * waveDir1 + vec3(uv / 4.0, 0)) - 0.5;
	float s0 = 0.5 * sin(currentTime * 1.7 + dot(waveDir2, uv));
	float s1 = 0.8 * sin(currentTime * 2.3 + dot(waveDir3, uv) + 3.3 );
	return (s0 + s1 + f) * 0.3;
}
Which make use of the following functions:
float hash( float n ) { return fract(sin(n) * 753.5453123); }

float noise( in vec3 x )
{
    vec3 p = floor(x);
    vec3 f = fract(x);
    f = f * f * (3.0 - 2.0 * f);

    float n = p.x + p.y * 157.0 + 113.0 * p.z;
    return mix(mix(mix( hash(n +   0.0), hash(n +   1.0), f.x),
                   mix( hash(n + 157.0), hash(n + 158.0), f.x), f.y),
               mix(mix( hash(n + 113.0), hash(n + 114.0), f.x),
                   mix( hash(n + 270.0), hash(n + 271.0), f.x), f.y), f.z);
}

// Fractal Brownian Motion Noise
float fbm(vec3 pp){
    float f = 0.0;
    mat3 m = mat3( 0.00,  0.80,  0.60,
                  -0.80,  0.36, -0.48,
                  -0.60, -0.48,  0.64 ) * 2;
    f  = 0.5000 * noise( pp ); pp = m*pp;
    f += 0.2500 * noise( pp ); pp = m*pp;
    f += 0.1250 * noise( pp ); pp = m*pp;
    f += 0.0625 * noise( pp ); pp = m*pp;
    f += 0.03125 * noise( pp ); pp = m*pp;
    f += 0.0150625 * noise( pp ); pp = m*pp;
    return f;
};
It may look like jibberish, but the principle is quite easy. We have two sine waves in different directions and a fractal brownian motion (fbm) summed together. The magic numbers are just arbitrary to break symmetry, or aliasing if you will. The noise and hash functions generate good enough random values from a vec3.
To compute the normal of this function, either derive an expression analytically (probably no ;) ), or just sample this function as described for the heightfield texture (terrain). You may play around with this function to make different wave forms in the water!
For more inspiration on wacky procedural generation, visit ShaderToy. You might even recognize some functions from there!
More links: