Tools you will need
In the lab rooms we will be working on Windows 10. The following tools are already installed in those computers, but you can install them at your personal computer by following these instructions.
To work in the labs you can jump to the Initial Setup section.
Visual Studio
This is the IDE (Integrated Development Environment) provided by Microsoft. Its Community Edition is fully featured and free for use by students, in open-source projects and for individual developers.
You can download it from here.
When installing you will get a list of options, including several languages, grouped in what the installer calls "Workloads", as illustrated in the following image:
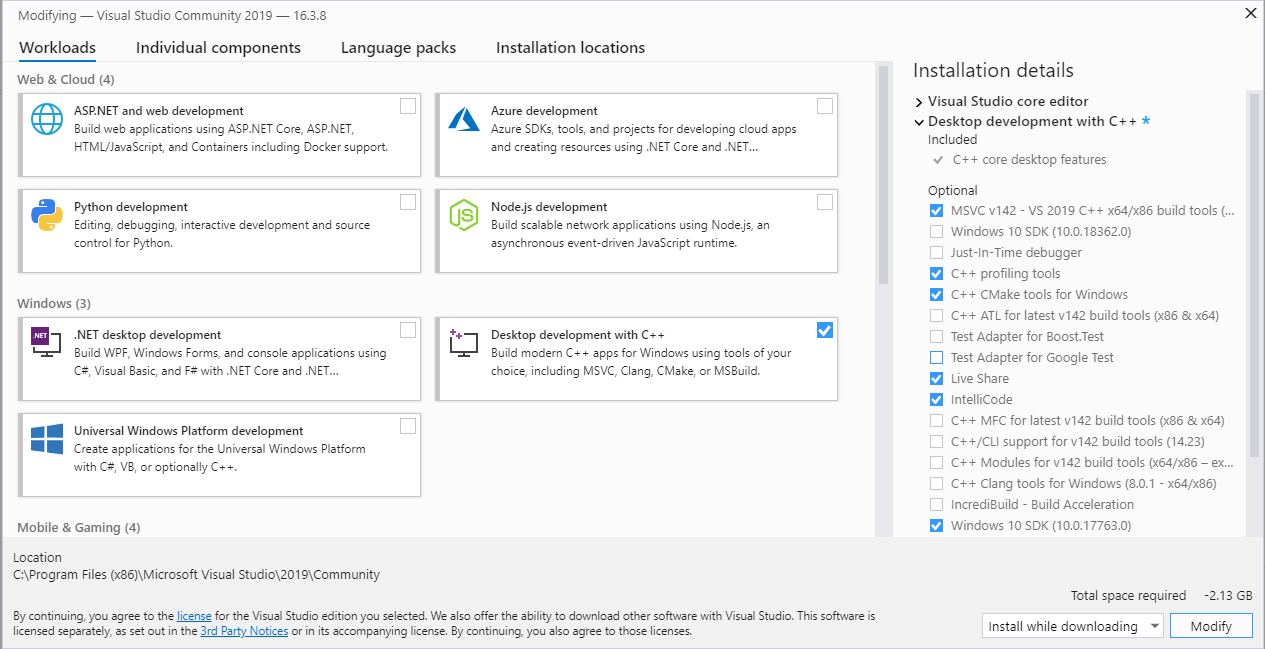
You need to select the option "Desktop development with C++". You can select others if you feel so inclined, but we will only be using the mentioned one. In the picture you can see the minimum components that you need to install (on the right).
CMake
CMake is a tool used to generate project files for different platforms and IDEs. We use it to simplify the process of updating versions of Visual Studio, as well as so Linux users can work with the codebase too.
You can get the installer from here, under the Binary distributions section.
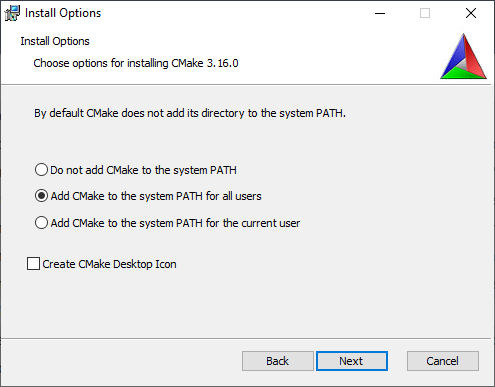
When installing we recommend that you choose to add CMake to your PATH environment variable, either for all users or only for your current user. Otherwise you won't be able to access it through the CMD command prompt.
Git
Git is a version control system very widely used. You may use it to download our source code (see below), and we recommend that you use it to keep track of your changes in the code. If you don't want to use git just skip this step. Below you will also find how to download and work on the project without it.
Even though there are graphical interfaces to manage git repositories, since each is different and they all have their quirks, we will only be able to support working through the command line interface.
You can get the installer from here.
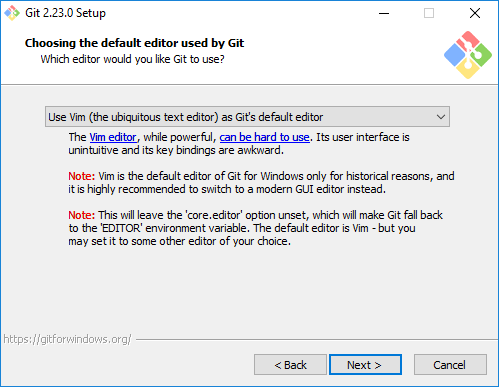
When installing, most of the default options will be appropiate. We recommend, though, that you change the default editor git will be using when you are asked to. Choose whatever source code editor you are most comfortable with. If you don't have any installed, you might want to first install Visual Studio Code (this is not the same as the Visual Studio we installed before) or Notepad++.
GLSL extension for Visual Studio
Once you have installed Visual Studio you may want to install this extension, since you will be working extensively with GLSL shaders in these labs, this extension will provide you proper syntax highlighting, code completion, error highlighting, etc.
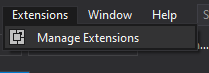
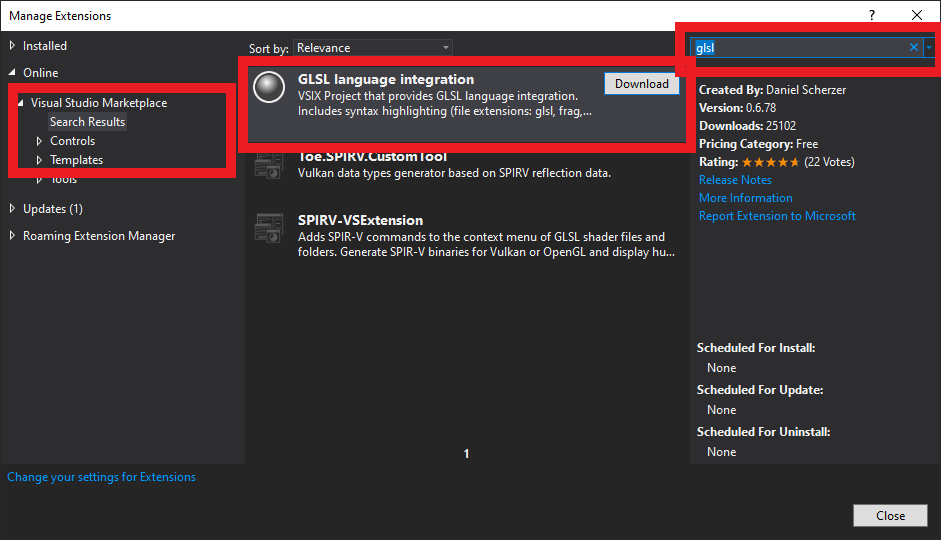
To install it open Visual Studio and find the menu Extensions > Manage Extensions.
Once there, select Online on the left to look for new extensions and type glsl on the top right input. Select the extension GLSL language integration and press Download. It will be installed once you close Visual Studio. Do so now and follow the instructions for it to install.
Initial Setup
In this section we explain how to download, configure and build the code for the labs.
Downloading the code for the Labs
With git
This way takes a bit more effort than not using git, but it has many benefits.
Let's start by opening the terminal to work with git. If you didn't change any options in the installer (apart from the text editor), you should be able to search for "git" in your start menu, and that should show the option Git Bash. Open it, and a MINGW terminal window should open:
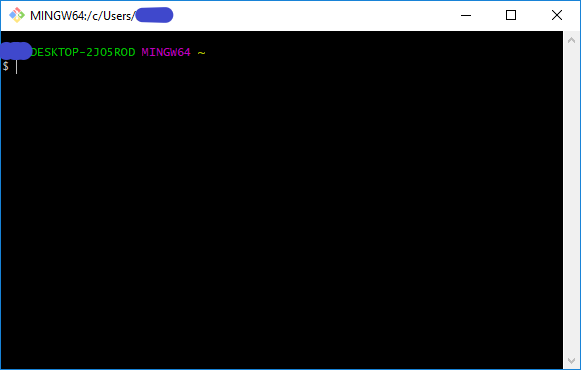
Now you can mostly just copy-paste the following commands into it. In this terminal you need to use right-clicking or Shift+Insert to paste things.
First of all, the terminal has been opened in your user directory. If you want to store the lab code in your Documents directory, for example, type:
cd Documents
Now we are going to download the source from our online repository. Run the following command:
git clone -o upstream https://gitlab.com/chalmerscg/tda362-labs.git
Wait for the command to finish running. You should now have a new directory called tda362-labs. This is all you need from git, for now.
You can now rename the directory where the repository was downloaded, either from the file explorer or by running:
mv tda362-labs new_directory_name
Without git
If you don't want to use git for version control, you can download the code from the labs from https://gitlab.com/chalmerscg/tda362-labs or by using this direct link to the archive https://gitlab.com/chalmerscg/tda362-labs/-/archive/main/tda362-labs-main.zip. Keep in mind that in this case, if we update the code you will need to download it again. This is not recommended.
Just download the zip file, decompress it wherever you want it to reside in your system, and jump to the next step.
Configuring the projects with CMake
There are two ways to work with CMake, through the terminal or through its GUI.
If you need to modify any of the files or want later to create your own projects using cmake you can find the documentation for it here.
GUI
- Search for
cmakein the Windows Start menu and you should get the result CMake (cmake-gui). Open that, and a screen like this should open: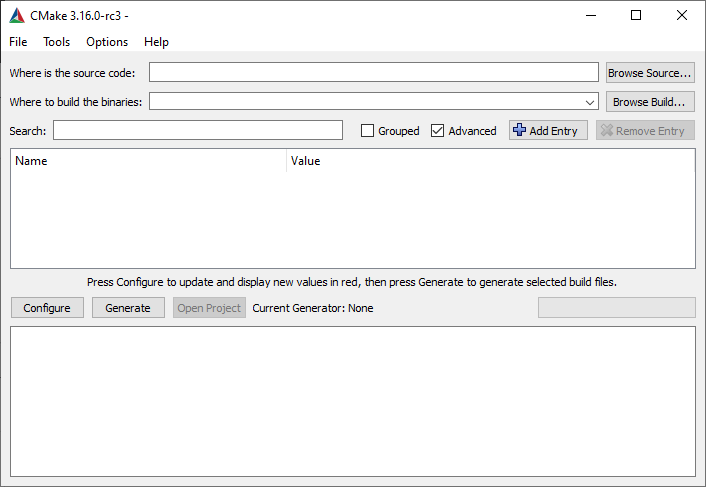
- In the first text input field "Where is the source code" put the directory where you downloaded the projects. You can browse to it using the button on the right.
- Copy the value of the first field into the second one and add
/buildat the end of it. It should look similar to the next screenshot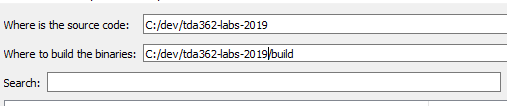
- Click Configure. You will be asked to create the missing build directory. Select yes and a screen similar to this one should open:
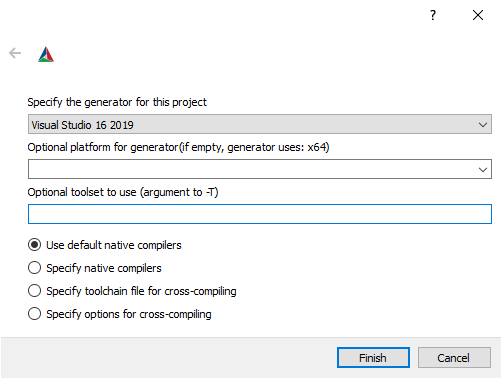
- Select Visual Studio 17 2022 as the generator and press Finish. Wait for the output display to say
-- Configuring done. - Press Generate. Once you see
-- Generating doneyou can press Open Project to open the newly generated project in Visual Studio. You can now close CMake. You can also find the generated project in the build directory that was created in step 4.
Terminal
On the lab computers, CMake is not installed with the PATH set, so it is much easier to use the GUI version described above.
We can do this from the same terminal where you were running the git commands, or you can do it from the Windows cmd command line interface.
- Start by moving inside the directory we downloaded in the previous step:
cd tda362-labs
- Now create a directory where the generated project files will be put into and move inside that
mkdir build
cd build
- Next you need to run cmake to generate the initial configuration of the project:
cmake -G ..
Wait for the command to finish. It should end by printing out something like
-- Configuring done
-- Generating done
-- Build files have been written to: .....
- Now you can go to the build directory and double-click the file
computer-graphics-labs.slnto open the newly created project in Visual Studio.
Working on the Labs
Following are some tips so you can start getting comfortable with the tools you will be working once the projects have been generated.
Building with Visual Studio
Once the project is created and you have it open in Visual Studio you will want to compile and run it.
First of all locate the Solution Explorer where you can see the list of projects in the labs, similar to the one in the picture:
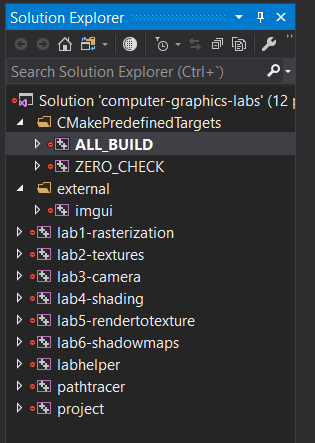
The project with the name in bold is the active project. It's the project that will be built, along with its dependencies, as well as the one that will be executed when you try to run from within VS. In this case the first time you open the solution after generating with CMake, the project ALL_BUILD will be the one set as active, which builds all other projects but you won't be able to run it.
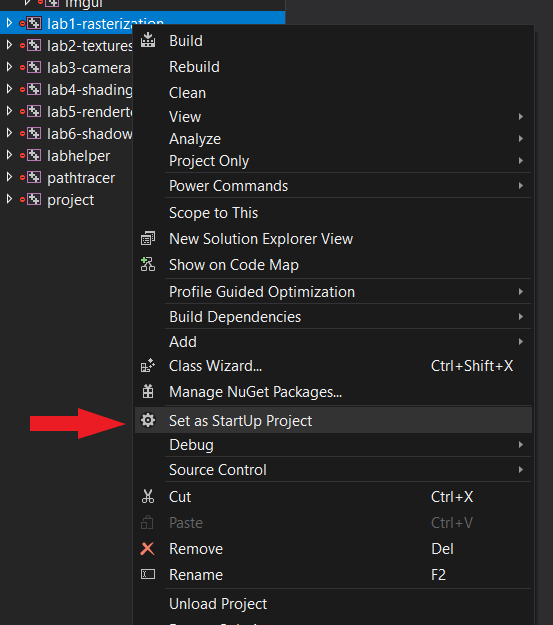
To change the active project: right click on the project you want to make active and click on Set as StartUp project.
Now you can build the project by selecting in the menu bar Build > Build Solution.
Trying to run the project directly will also be build the solution before running, so that saves you one step. Do that either in the menu bar Debug > Start Debugging, or by clicking on the toolbar on the green triangle:

On the left of this triangle there are two drop-down boxes. The one on the right in this case will only have the value for "x64", that's okay. The box on the left, on the other hand, has the values "Debug", "RelWithDebInfo" and "Release". These are two configurations that change the level of optimization the compilation applies on the code:
- In Debug you can add breakpoints, see values for variables when the program is paused, etc.
- In Release it runs a lot faster, but your debug options are severely limited.
- In RelWithDebInfo the program will run as fast as if it was on Release and you will also be able to set breakpoints, but not everywhere, as some parts of the code might have become optimized out. You will also have very limited view of variables' values.
It is recommended that you use the Debug configuration when developing, and Release to show your cool program to the world. RelWithDebInfo should only be used if Release has bugs that either don't appear in Debug or that Debug is too slow to reproduce properly.
Using git for version control
Following you will find a small collection of very basic commands to do the most basic actions in git.
GitLab
Git has many features. One of them is that it makes it easy to save your code in the cloud. There are several websites that offer this service, like Github, Bitbucket, and others. We like to use GitLab as it is free and Open-Source. You can create your own account with unlimited private and public repositories as well as unlimited collaborators for both from here.
Once you have your account you should create a new private project where you will store your labs repository.
Git Command Line Interface
Open the Git Bash terminal as you did when setting up the project and navigate to where your repository is.
Note: If you didn't clone the repository but downloaded it as a zip instead, you need to initialize the directory as a git repository. To do that, once you are in the directory that contains all the project subdirectories, run the following command:
git init
This should set up the repository for you.
Configuring Git and the project
First of all we need to setup git so it uses our information to mark the versions. Run the following commands:
git config --global user.name "Your Name"
git config --global user.email "your_email@mail.com"
It's best if you set your email as the same one with which you registered in Gitlab, as then Gitlab will be able to link your user to the changes made.
In git versions are called "commits". When we talk about a commit, we mean the state the code was at when that version was created. Commits have a description to explain the changes that you have made, as well as a hash identifier.
Unless otherwise specified, all the following commands are run from the root directory of the git repository.
Status and differences
To view what files in the repository have had changes since the last commit run
git status
This will print out a list of files whose contents have changed as well as files that have been added or removed. Initially these will appear in red, as they are changes not yet staged to be commited. To see the specific differences for each file line by line run
git diff _file_to_diff_
Staging changes
To stage a file or list of files to be commited run
git add _file_path_
git add _file_path1_ _file_path2_ ...
And if you want to stage all files at once you can run
git add -A
Commiting
To save the current state of the staged files as a new version run:
git commit -m "This is the description for the changes in this commit"
If you now check the status again you will see the files selected no longer appear as changed.
Saving to the cloud
Once you have commited some work you will want to save that on your Gitlab repository.
First of all, let's tell git where the cloud repository is located. You can get the url to upload to GitLab from your project's page, clicking the Clone button. Get the HTTPS url, not the SSH one, unless you know how to set up SSH. Use this URL when running the following command:
git remote add origin https://gitlab.com/_YOUR_USER_/_YOUR_PROJECT_.git
Now let's upload our history to the cloud. The first time after setting up the origin repository you will need to tell git that your local master branch has to connect to origin's master branch, like so:
git push -u origin/master
Now you will get asked for your password to your gitlab account. This wouldn't be needed if you were using the SSH link, but that's out of the scope of this guide.
After this is done you will be able to push again the next time you have things to upload to the cloud without having to specify the upstream branch just by doing
git push
Getting changes from the cloud
If you or someone else has made changes to the code from a different computer and has pushed them, you will need to merge those with your code. To download the latest changes from the cloud run
git fetch origin
If you check the status now and there are changes in the cloud that you don't have in your working copy it will tell you how many commits behind you are. To get these changes into your copy run
git pull
This should add the changes automatically to your code. If you had made changes to the same files that were changed in the cloud, you will get merge conflicts instead, in which case you will have to go through the conflicting files and solve these conflicts manually. If you need to do that, you can refer to this stackoverflow answer for a bit of help on how to get started.
More Advanced Actions
You can find a more detailed set of basic instructions here.
You might also want to look at more advanced uses of git as version control and how to work in groups with it. You can start by looking for what is called the "Git Flow" which gives directives on how to work in teams by creating branches of the code for different features.
Finally, you can find a pretty detailed cheat-sheet of git commands and how they change the state of objects here and a simpler version in pdf here.
Visual Studio Live Share
With this functionality that comes by default with VS2019 you should be able to interact with each other's code in real time remotely. To use it you need to start a Live session and invite your peers either through the VS interface or by giving them the link VS will provide. They will then start seeing the code in your local files, and either can follow the other as they edit or move through the code.
OpenGL Documentation
You can find the documentation for any OpenGL and GLSL functions in the official site: https://www.opengl.org/documentation/.
The navigation in the official documentation is not always the best (it's quite ugly, to be honest) so here's an alternative which offers a nicer interface: http://docs.gl/
Finally here's a cheat sheet with all the methods and functions for OpenGL 4.3 as well as GLSL 430: https://www.khronos.org/files/opengl43-quick-reference-card.pdf
Other Platforms
OpenGL is supported on many different platforms, but combinations of platforms and harware may support different versions of OpenGL. We only support Windows systems in the dedicated lab rooms. If you still wish to try to do the labs on another platform, please make sure that it meets the requirements and be prepared to find your own workarounds if it doesn't.
Visual Studio Code
Visual Studio Code may be used as an alternative to Visual Studio, including support for the Live Share functionality. For that, you are going to need to install the plugin Live Share. The functionality now should be the similar to the one for Visual Studio.
Linux
Even though we don't officially support Linux, some of our TAs use Linux and there have been successful attempts in the past of using Linux to build and run the lab projects. We recommend you use Visual Studio Code for linux so you can interact with your group peers and with the TAs during online labs through the Live Share plugin.
You can find some information on how to attempt to set up the code in the README_LINUX.md file in the root of the code repository.
Mac OSX
Apple hasn't supported OpenGL officially for many years now, with the only drivers for that platform being extremely outdated, so we can't offer support for working with the platform. The best way we think you can follow with the labs if you don't have other options is by virtualising a Windows system. You can get a free license for students of VMware Fusion and install a copy of Windows 10 on top of that. Hopefully this method will work for you well enough. You should have access to a copy of Windows 10 from Chalmers' on-the-hub collaboration with Microsoft, but one doesn't actually need a product key to install and use windows, so that could be a temporary option too.