Introduction
calculateDirectIllumination() and calculateIndirectIllumination() in shading.frag from tutorial 4 to the place-holder implementation in this tutorial (the shader is called shading.frag also in this tutorial). The result should look like below:
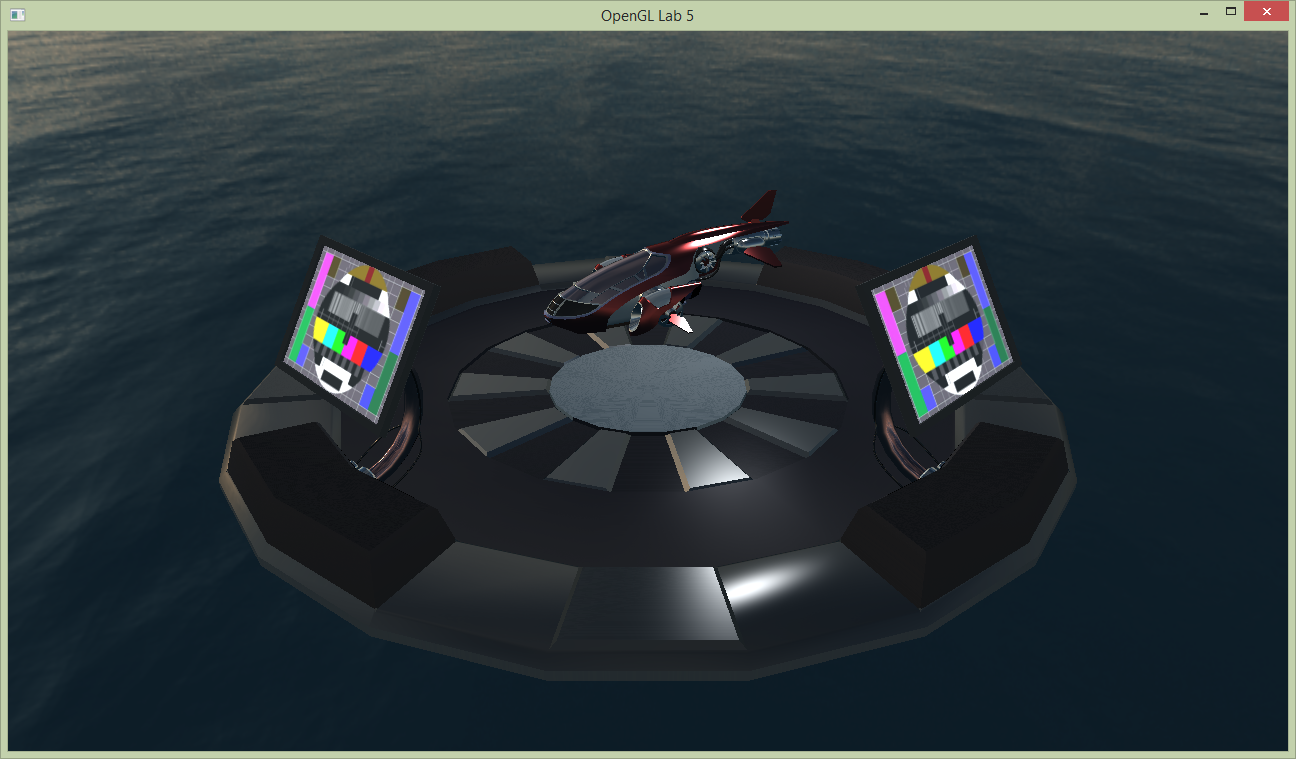 There are monitors beside the landing pad which currently have a static emissive texture showing a tv test image. We will replace this texture with a video feed from a security camera hoovering on the opposite side of the platform. This is done in two steps:
- Render from the security cameras point of view to a framebuffer.
- Use the color texture from the framebuffer as emissive texture.
FboInfo, but it is not completed yet. In the constructor, we have generated two textures, one for color and one for depth, but we have not yet bound them together to a framebuffer.
Setting up Framebuffer objects
// >>> @task 1
glGenFramebuffers(1, &framebufferId);
glBindFramebuffer(GL_FRAMEBUFFER, framebufferId);// bind the texture as color attachment 0 (to the currently bound framebuffer)
glFramebufferTexture2D(GL_FRAMEBUFFER, GL_COLOR_ATTACHMENT0, GL_TEXTURE_2D, colorTextureTarget, 0);
glDrawBuffer(GL_COLOR_ATTACHMENT0);// bind the texture as depth attachment (to the currently bound framebuffer)
glFramebufferTexture2D(GL_FRAMEBUFFER, GL_DEPTH_ATTACHMENT, GL_TEXTURE_2D, depthBuffer, 0);initGL(), there is a section devoted to creation of framebuffers. We will create five framebuffers and push them to the vector fboList, enough framebuffers for the mandatory and optional assignments in this tutorial.
int w, h;
SDL_GetWindowSize(g_window, &w, &h);
const int numFbos = 5;
for (int i = 0; i < numFbos; i++) {
    fboList.push_back(FboInfo(w, h));
}display(). Have a look at how this is implemented.
Rendering to the FBO
fboList. Bind the framebuffer at @task 2 with:
// >>> @task 2
FboInfo &securityFB = fboList[0];
glBindFramebuffer(GL_FRAMEBUFFER, securityFB.framebufferId);glViewport(0, 0, securityFB.width, securityFB.height);
glClearColor(0.2, 0.2, 0.8, 1.0);
glClear(GL_COLOR_BUFFER_BIT | GL_DEPTH_BUFFER_BIT);securityCamViewMatrix and securityCamProjectionMatrix.
Now we are to use the color attachment as a texture (emissiveMap in shading.frag) when we render the landing pad from the users view below. We will just change the texture id used in the landing pad model.
labhelper::Material &screen = landingpadModel->m_materials[8];
screen.m_emission_texture.gl_id = securityFB.colorTextureTarget;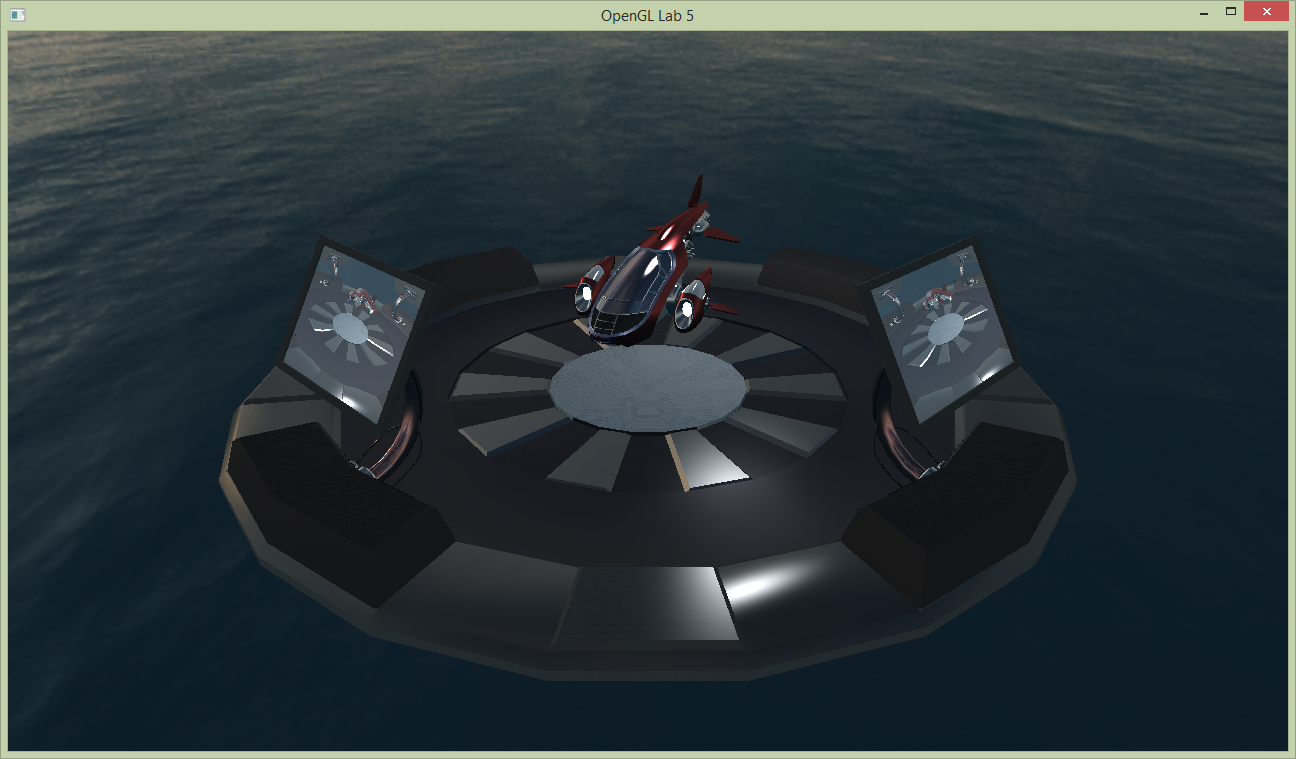
Rendering the FBO fullscreen
fboList, and then render normally.
If you run the application now you will see a black screen, since nothing has been rendered to the default framebuffer.
To see the scene rendered on the screen again:
- Bind the default framebuffer and clear it.
- Set
postFxShaderas the active shader program. - Bind the framebuffer texture to texture unit 0.
- Draw a quad that covers the viewport to start a fragment shader for each pixel on the screen (see below).
labhelper::drawFullScreenQuad();
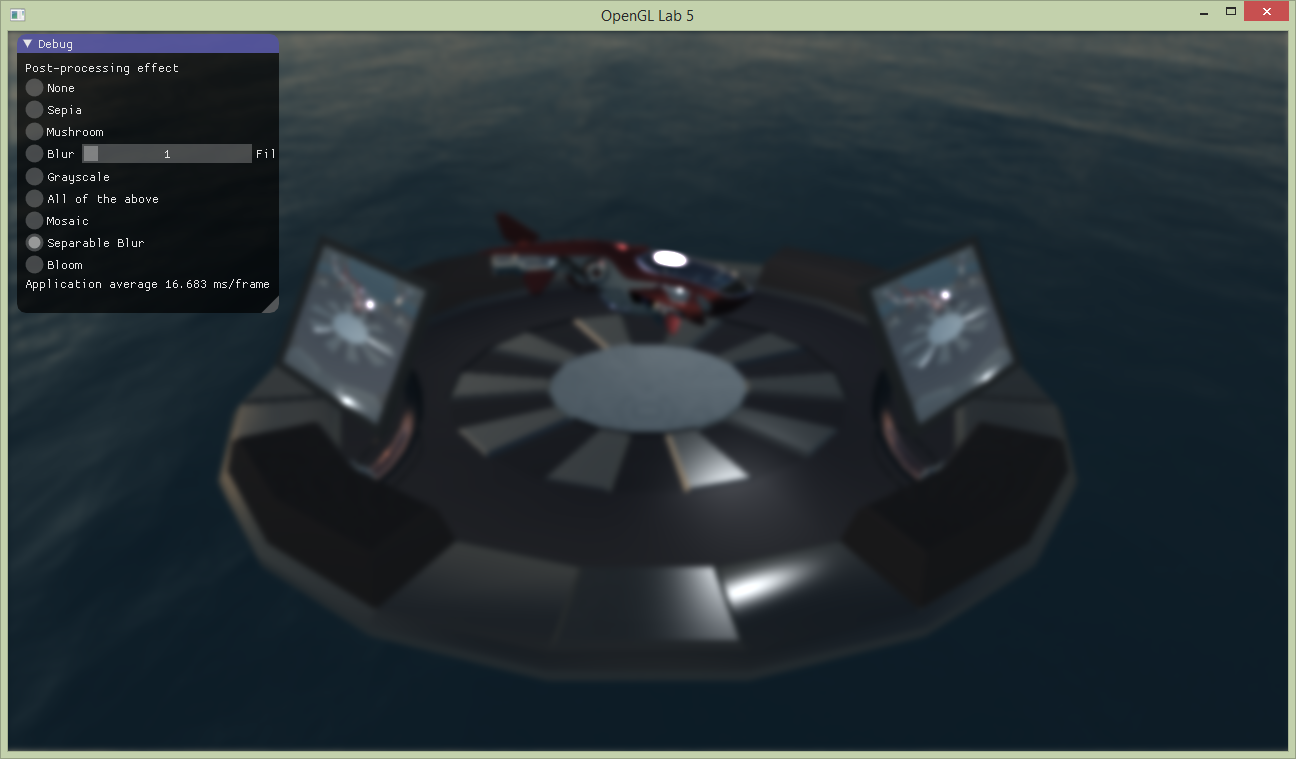
Post processing
postFxShader, the shader we used in the previous task to draw the framebuffer to the fullscreen. To change the effect used and pass some needed parameters to these effects we are going to need to set some uniforms for the shader. Add the following code after postFxShader has been set as active and before drawing the fullscreen quad:
labhelper::setUniformSlow(postFxShader, "time", currentTime);
labhelper::setUniformSlow(postFxShader, "currentEffect", currentEffect);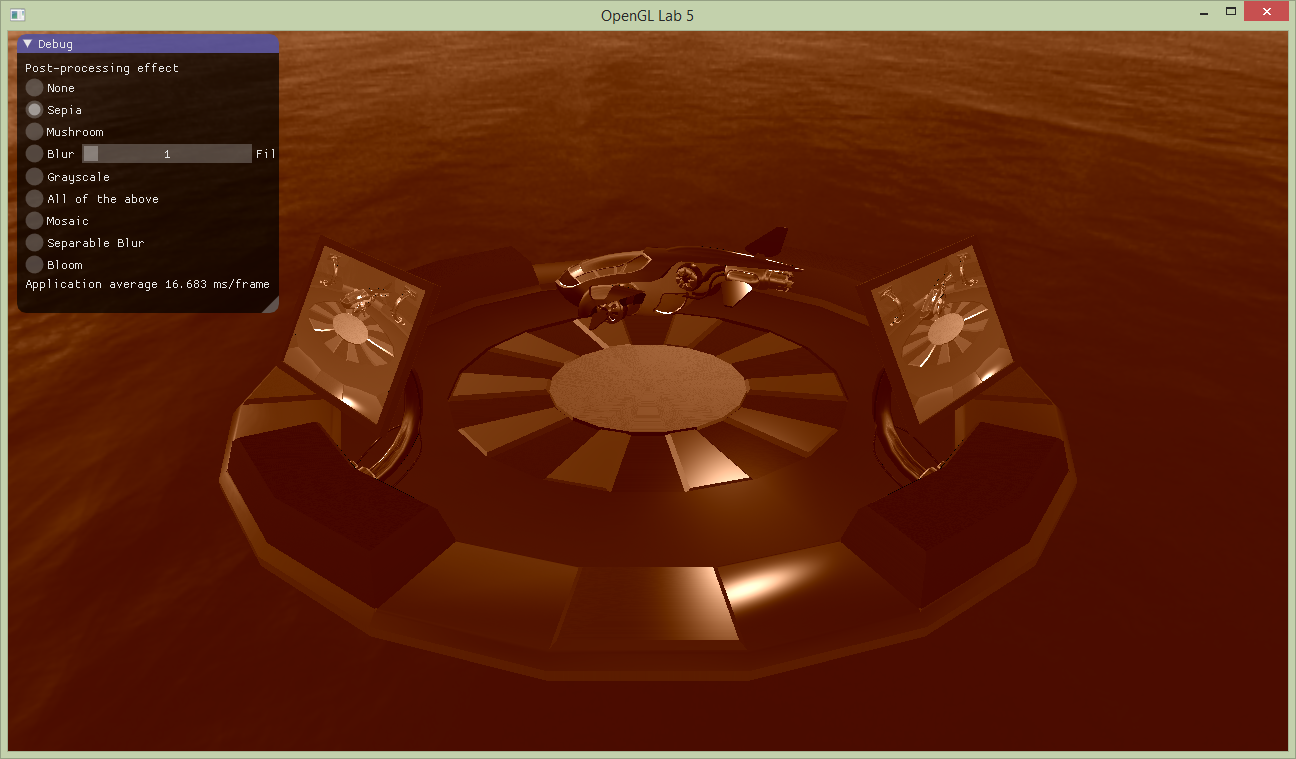
labhelper::setUniformSlow(postFxShader, "filterSize", filterSizes[filterSize - 1]);currentEffect which is set from the gui. You can toggle gui visibility by pressing G (you can also comment out the if surrounding the call to gui() in main()). With the Sepia post processing, that mimics a toning technique of black-and-white photography, the result looks like below.
 Inspect the postFx.frag shader again. There are several functions defined that can be used to achieve different effects. Notice that they affect different properties to achieve the effect: the wobbliness is affected by changing the input coordinate, blur samples the input many times, while the two last simply change the color sample value.
Note that we use a helper function to access the texture:
Inspect the postFx.frag shader again. There are several functions defined that can be used to achieve different effects. Notice that they affect different properties to achieve the effect: the wobbliness is affected by changing the input coordinate, blur samples the input many times, while the two last simply change the color sample value.
Note that we use a helper function to access the texture:
vec4 textureRect(in sampler2D tex, vec2 rectangleCoord)
{
return texture(tex, rectangleCoord / textureSize(tex, 0));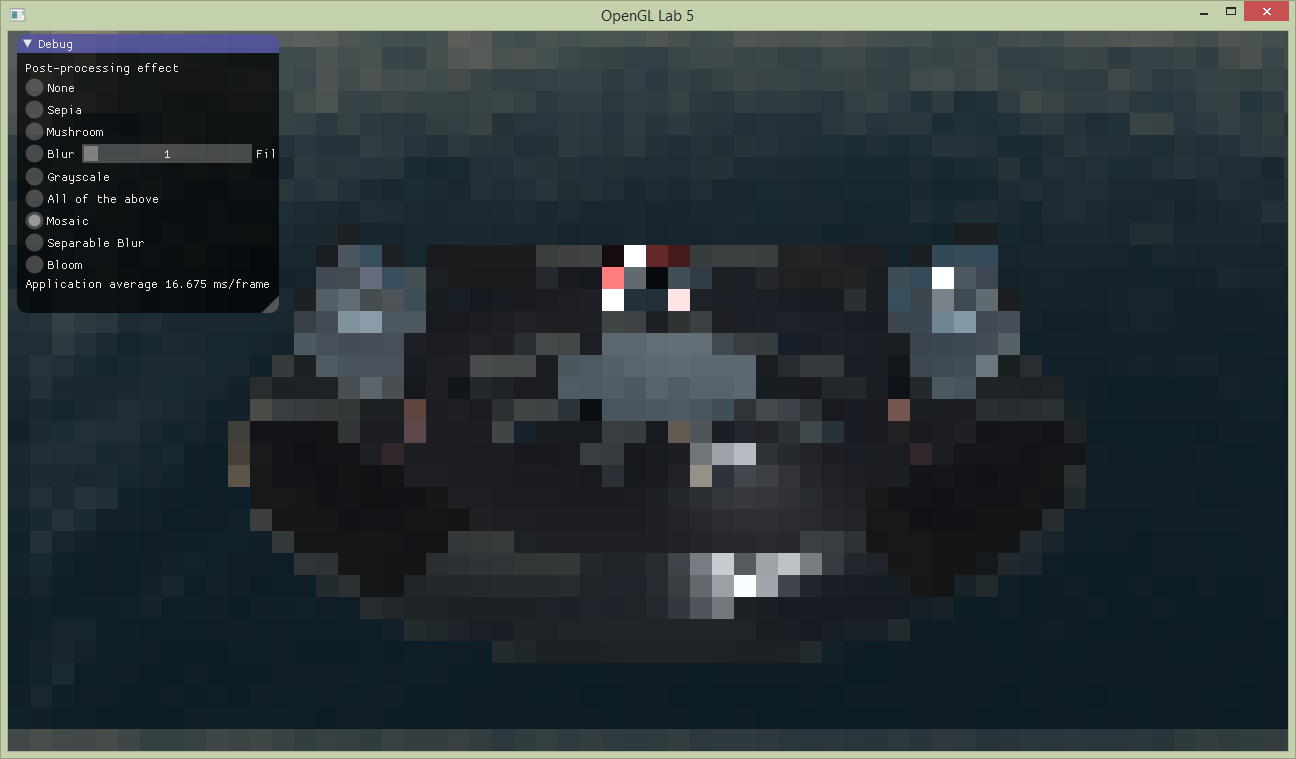
}vec2 mushrooms(vec2 inCoord);vec3 blur(vec2 coord);vec3 grayscale(vec3 sample);vec3 toSepiaTone(vec3 rgbSample);Post processing - Mosaic
When done, show your result to one of the assistants. Have the finished program running and be prepared to explain what you have done.
[Optional] Efficient Blur
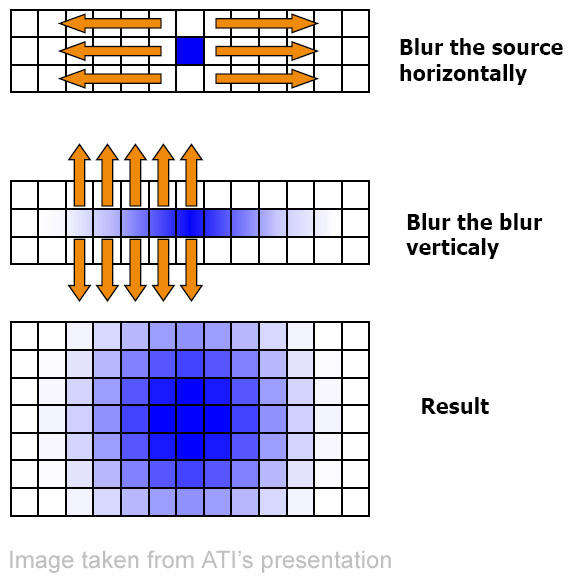 To implement this in our tutorial, we will use two more FBOs: one to store the result of the first, horizontal, blur pass, and then another to receive the final blur after the vertical blur pass. Note that, in practice, we can just ping-pong between buffers, to save storage space. However, this adds confusion, and we want the blur in a separate buffer to create bloom.
We have provided you with shaders implementing the horizontal and vertical filter kernels, see
To implement this in our tutorial, we will use two more FBOs: one to store the result of the first, horizontal, blur pass, and then another to receive the final blur after the vertical blur pass. Note that, in practice, we can just ping-pong between buffers, to save storage space. However, this adds confusion, and we want the blur in a separate buffer to create bloom.
We have provided you with shaders implementing the horizontal and vertical filter kernels, see shaders/horizontal_blur.frag and shaders/vertical_blur.frag. Load these together with the vertex shadershaders/postFx.vert, and store the references in variables named horizontalBlurShader and verticalBlurShader.To render the blur, use this algorithm:
- Render a full-screen quad into an fbo (here called
horizontalBlurFbo).- Use the shader horizontalBlurShader.
- Bind the postProcessFbo.colorTextureTarget as input frame texture.
- Render a full-screen quad into an fbo (here called
verticalBlurFbo).- Use the shader verticalBlurShader.
- Bind the horizontalBlurFbo.colorTextureTarget as input frame texture.
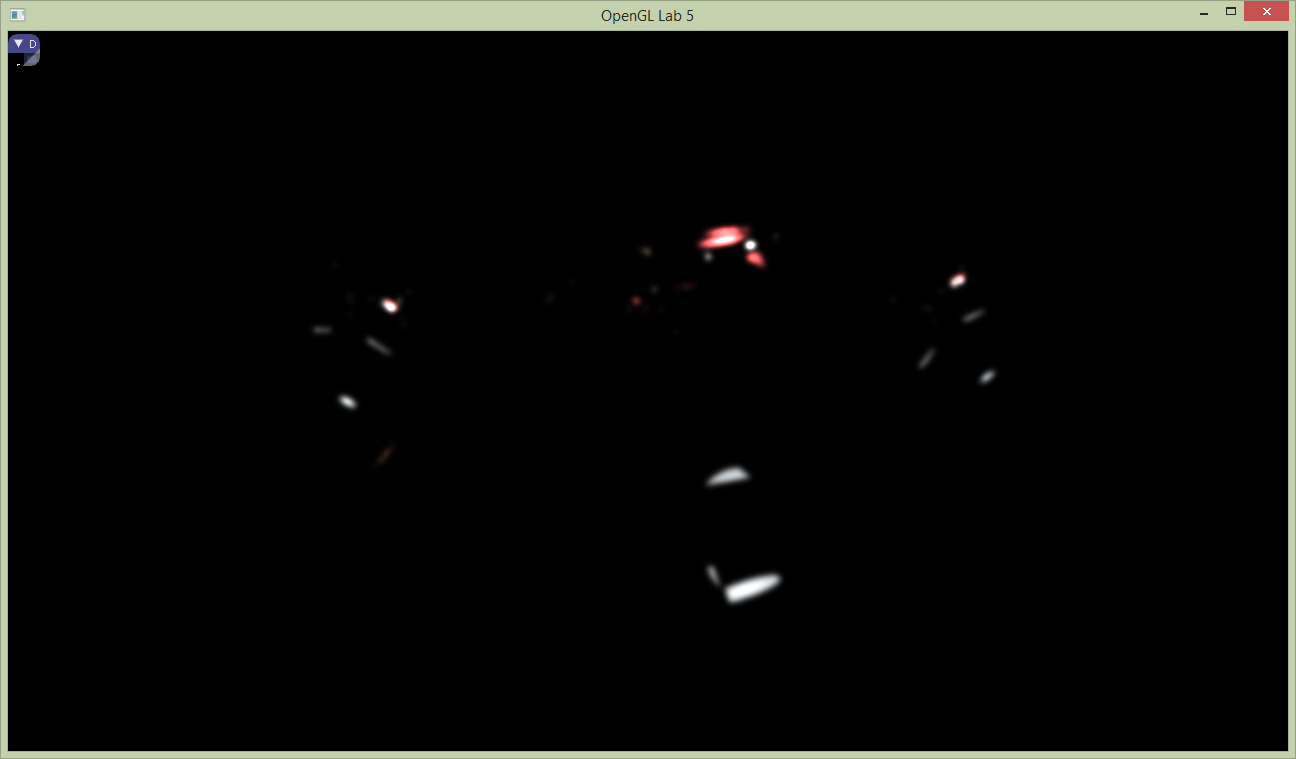
[Optional] 6: Bloom
shaders/cutoff.frag. Load the shader, use the fifth created FBO (here called cutoffFbo), and draw a full-screen pass into it. When visualized it should look like this:
 Then use the cutoffFbo as input to the blur, which should produce a result, a lot like the image below.
 Finally, all we need to do is to add this to the, unblurred, frame buffer (which should still be untouched in postProcessFbo). This can be achieved by simply rendering a full screen quad using additive blending, into this frame buffer. Another way is to bind it to a second texture unit during the post processing pass, and sample and add in the post processing shader. In our case, this last should be the easiest option. The screen shot below shows the bloom effect, where the blooming parts are also boosted by a factor of to, to create a somewhat over the top bloom effect.

When done, show your result to one of the assistants. Ask them more about post processing!