| Functional Programming -- Introduction to Gtk2Hs | TDA452 & DIT142 | LP2 | HT2011 | [Home] |
In Lab 4, you will use the library Gtk2Hs to implement the Graphical User Interface (GUI). This document describes everything you need to know about Gtk2Hs to complete this course (and more).
All code in this document is available.
Here is some more information about Gtk2Hs:
The two main examples used in the course are the following. Please download these and play with them by changing the code and seeing what happens! |
|
(To see what to do in order to compile and run your program, see the next section.)
On the student computer system at Chalmers, Gtk2Hs is already installed.
If you get
get the following error:
./MyProgram: error while loading shared libraries: libgio-2.0.so.0: cannot open shared object file: No such file or directoryYou need to tell the system where it can find the correct library files. You do this by typing: export LD_LIBRARY_PATH=/chalmers/sw/lib/glib-2.24.2/libbefore you run your program. You only need to do this once for each shell! After setting that it should work for that shell (if you create another shell or if you if you have not done it for this login yet you need to set it again). You may consider adding the above command to your .bashrc file. If you have installed Haskell on your own computer this should not be an issue. |
If you want to write a program that uses a GUI, you have to import the modules
that provide you with the relevant functions and datatypes:
  import Graphics.UI.Gtk
  import Graphics.UI.Gtk.Gdk.GC
Furthermore, it is a good idea to compile programs that use GUIs. One reason is that the Haskell interpreter GHCi sometimes gets confused if you start and stop a GUI too often in the same program, and crashes. You can avoid this by compiling your program.
To compile a program, make sure you have a main file (for example called MyProgram.hs) that defines a function main with the following type:
  main :: IO ()
  main = ...
Then, you type
ghc --make MyProgram
on the command line (not in GHCi!). After a while, there will be an executable file that is called MyProgram. You can execute it by typing:
./MyProgram
on the command line. (On Windows, the file will be called MyProgram.exe, and you can execute it by typing
MyProgram
on the command line.)
So, any GUI program must have a module with a function main. The function main must always start by initializing the graphical user interface (with the function initGUI), and always ends with waiting for the user to do something (with the function mainGUI):
  main :: IO ()
  main =
    do initGUI
       ...
       mainGUI
All your GUI programs will have the above structure.
A GUI consists of widgets, an abbreviation of window gadgets. Any part of the GUI that has a graphical representation on the screen is called a widget. Examples are: windows, buttons, labels, text, drawing areas, scrollbars, etc. etc.
Usually, the first widget you create in your GUI program is a window. You can do this using the function windowNew. You usually give a name to the window you create so that you can later add properties to the window (for example change its size, color, title, etc.)
    do ...
       win <- windowNew
To tell the window what title it should have (the title is the piece of text shown at the top of the window frame), use the function windowSetTitle:
windowSetTitle win "My Very Nice Title"
There are other properties you may set for a window, for example what should happen when someone closes the window? The right action to take is to quit the program (using the function mainQuit). This is how we say that:
win `onDestroy` mainQuit
In other words, onDestroy is a function that takes a widget (in this case the window win) and an instruction (in this case the function mainQuit), and executes that instruction whenever the widget is "destroyed".
When we are done, and want to show the window we have just created to the user, we use the function widgetShowAll, which displays a widget to the user:
widgetShowAll win
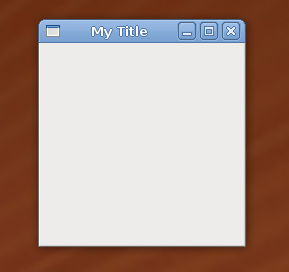
All code together:
  main :: IO ()
  main =
    do initGUI
       win <- windowNew
       windowSetTitle win "My Title"
       win `onDestroy` mainQuit
       widgetShowAll win
       mainGUI
This code is present here. The result:
→ You can see all functions related to Windows in the following module:
Graphics.UI.Gtk.Windows.Window
A very common widget in a window is a button, something the user can click on.
We create one by saying:
but <- buttonNew
As with windows, we can add some properties to a button, for example what text it should have:
buttonSetLabel but "Click Me!"
(We can actually abbreviate the above two lines by saying:
but <- buttonNewWithLabel "Click Me!"
)
We can also add an action to the button, that should be executed when the button
is clicked:
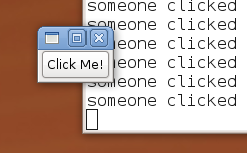
but `onClicked` putStrLn "someone clicked on me!"
In this case, we print a string on the terminal where the program was started. Of course, any instruction can be added to a button like this.
If we want the button to be placed in a window (for example win), we can add it by saying:
containerAdd win but
The window win is seen as a "container" that contains a button.
All code together:
  main :: IO ()
  main =
    do initGUI
       win <- windowNew
       windowSetTitle win "My Title"
       win `onDestroy` mainQuit

       but <- buttonNewWithLabel "Click Me!"
       but `onClicked` putStrLn "someone clicked on me!"

       containerAdd win but
       widgetShowAll win
       mainGUI
This code is present here. The result:
→ You can see all functions related to Buttons in the following module:
Graphics.UI.Gtk.Buttons.Button
What happens when we want several buttons in one window? In that case, we will use a new widget, a container widget.
A container widget can contain several other widgets. There are two basic container widgets, horizontal boxes and vertical boxes. In a horizontal box, widgets lie next to each other in a row. In a vertical box, widgets lie on top of each other, in a column. By combining horizontal and vertical widgets, we can create arbitrary layouts of widgets.
Suppose we have three buttons:
       apa  <- buttonNewWithLabel "Apa"
       bepa <- buttonNewWithLabel "Bepa"
       cepa <- buttonNewWithLabel "Cepa"
Here is how we create a horizontal box for example:
row <- hBoxNew False 5
The function hBoxNew takes two arguments: (1) a boolean indicating if all widgets should get equally much space, (2) the number of pixels to use between each of the widgets in the box.
We use the function containerAdd to add a given widget to a container:
       containerAdd row apa
       containerAdd row bepa
       containerAdd row cepa
Finally, we tell the window that the horizontal box is the actual contents of the window:
containerAdd win row
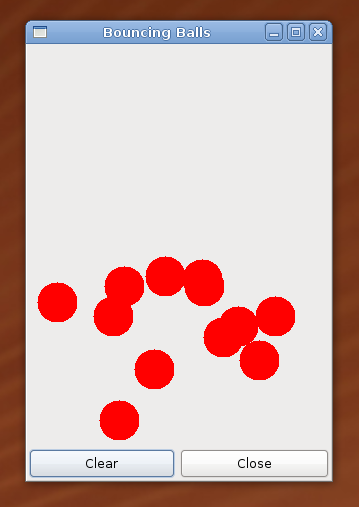
As pointed out before, we can combine hboxes and vboxes to create arbitrary layout. For en example,
see BouncingBalls.hs.
All code together:
main :: IO ()
main =
do initGUI
win <- windowNew
windowSetTitle win "My Title"
win `onDestroy` mainQuit
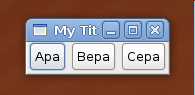
apa <- buttonNewWithLabel "Apa"
bepa <- buttonNewWithLabel "Bepa"
cepa <- buttonNewWithLabel "Cepa"
row <- hBoxNew False 5
containerAdd row apa
containerAdd row bepa
containerAdd row cepa
containerAdd win row
widgetShowAll win
mainGUI
This code is present here. The result:
→ You can see all functions related to hBox and vBox in the following modules:
Graphics.UI.Gtk.Layout.HBox
Graphics.UI.Gtk.Layout.VBox
Labels are simple widgets that just contain text. We create them using labelNew:
lab <- labelNew Nothing
That function wants a "Maybe String" as an argument; we could also have said:
lab <- labelNew (Just "Some piece of text")
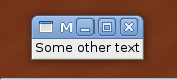
The text of a label can be changed anytime by saying:
labelSetText lab "Some other text"
All code together:
  main :: IO ()
  main =
    do initGUI
       win <- windowNew
       windowSetTitle win "My Title"
       win `onDestroy` mainQuit

       lab <- labelNew Nothing
       labelSetText lab "Some other text"

       containerAdd win lab
       widgetShowAll win
       mainGUI
This code is present here. The result:
→ You can see all functions related to Labels in the following module:
Graphics.UI.Gtk.Display.Label
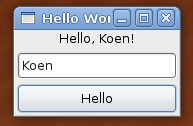
Another common widget in a window is an entry field, or just "entry". This
is a box where the user can type in text. We create one by saying:
ent <- entryNew
We can find out what text has been typed in the entry by saying:
s <- entryGetText ent
And changing the text in the entry by saying:
entrySetText ent "new text"
We can also tell the entry to execute certain instructions when certain events happen. For example, when the user types in text and presses "return", we can execute an instruction:
ent `onEntryActivate` putStrLn "the user pressed return"
A complete example:
main :: IO ()
main =
do initGUI
win <- windowNew
windowSetTitle win "My Title"
win `onDestroy` mainQuit
ent <- entryNew
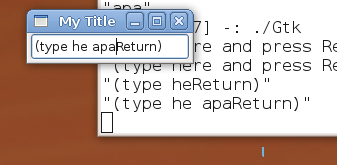
entrySetText ent "(type here and press Return)"
ent `onEntryActivate` do s <- entryGetText ent
print s
containerAdd win ent
widgetShowAll win
mainGUI
This code is present here. The result:
→ You can see all functions related to Entries in the following module:
Graphics.UI.Gtk.Entry.Entry
A drawing area or canvas is a widget that starts off as a blank slate, but on which you can draw
graphical objects such as lines and circles. A canvas is created by:
can <- drawingAreaNew
There are many properties we can add to a drawing area. An important one gives us
a way to specify what the size of the canvas should be:
can `onSizeRequest` return (Requisition 500 300)
This means that whenever someone is interested in what size the canvas should be, we simply return
the answer "500 x 300 pixels". (This way of specifying the size might seem a bit complicated, but it
allows for a very flexible way of changing the size and adapting to the surroundings. However,
in the course, we will just use the simple way of specifying the size.)
Another property we should specify is what the contents of the canvas should be. We do this by saying:
can `onExpose` drawCanvas can
Here, we still have to implement the function drawCanvas. (See below for an example.)
So, how can we draw for example lines on a canvas? There are two more concepts we need to learn about: the drawing window and the graphics context. The drawing window is the part of the canvas on which the actual drawing happens. We get it by saying:
dw <- widgetGetDrawWindow can
(Note: most widgets have a drawing window one can get hold of in this way, so you can use this to draw lines and circles on buttons, labels, etc.)
Once we have the drawing window, we can for example clear it, so we can start drawing afresh:
drawWindowClear dw
If you do not do this, then previous lines and circles you have been drawing in the drawing window will still be there.
In order to start drawing, we need to create a graphics context (GC).
A graphics context contains all information about color, style, line thickness, etc. (more on graphics contexts below). To create a default
graphics context (drawing color is black, line thickness is one pixel), say:
gc <- gcNew dw
Now we can draw stuff! To draw a line in a given drawing window dw using a given graphics context gc,
we can say:
drawLine dw gc (10,10) (100,100)
which draws a line from the coordinate (10,10) to (100,100).
A complete example:
main :: IO ()
main =
do initGUI
win <- windowNew
windowSetTitle win "My Title"
win `onDestroy` mainQuit
can <- drawingAreaNew
can `onSizeRequest` return (Requisition 500 300)
can `onExpose` drawCanvas can
containerAdd win can
widgetShowAll win
mainGUI
drawCanvas :: DrawingArea -> event -> IO Bool
drawCanvas can _evt =
do dw <- widgetGetDrawWindow can
drawWindowClear dw
gc <- gcNew dw
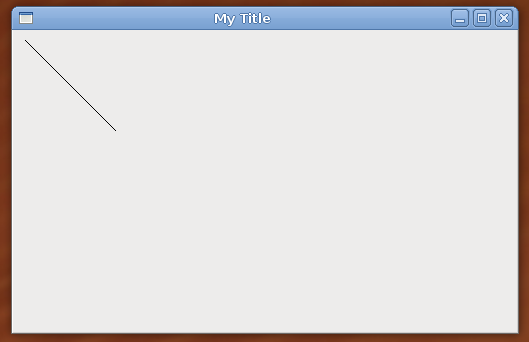
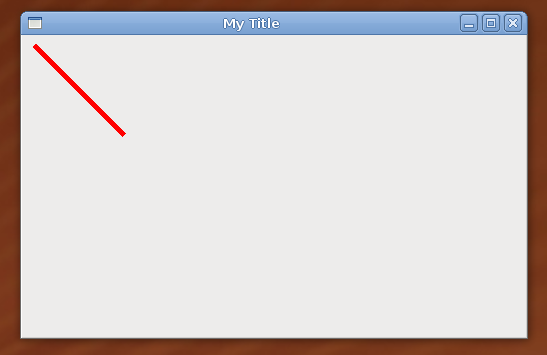
drawLine dw gc (10,10) (100,100)
return True -- everything is OK
This code is present here. The result:
→ You can see all functions related to Drawing Areas in the following modules:
Graphics.UI.Gtk.Misc.DrawingArea
Graphics.UI.Gtk.Gdk.Drawable
Graphics.UI.Gtk.Gdk.GC
The default graphics context (GC) has a black drawing color and a line thickness of 1 pixel. You can change this by
using the datatype GCValues, which is a big record with lots of functions (click on the documentation below to see all).
In order to change the drawing color to red and line thickness to 5, we can say:
     redAndThick <- gcNew dw
     gcSetValues redAndThick newGCValues{ foreground = red
                                        , lineWidth  = 5
                                        }
The record newGCValues contains all default GC settings.
As usual, we can abbreviate the creation of the graphics context thusly:
     redAndThick <- gcNewWithValues dw newGCValues{ foreground = red
                                                  , lineWidth  = 5
                                                  }
We have to define the color red, which is made according to RGB (red-green-blue) values; three numbers (0-65535)
specifying how much red, green and blue the color has. We can for example define:
  red   = Color 65535 0 0
  green = Color 0 65535 0
  blue  = Color 0 0 65535
  white = Color 65535 65535 65535 -- all colors
  black = Color 0 0 0             -- no colors
Now, we can draw a line using the new color and thickness:
drawLine dw redAndThick (10,10) (100,100)
You can create several different graphics contexts for the same drawing window.
An example:
  drawCanvas :: DrawingArea -> event -> IO Bool
  drawCanvas can _evt =
    do dw <- widgetGetDrawWindow can
       drawWindowClear dw
       redAndThick <- gcNewWithValues dw newGCValues{ foreground = red
                                                    , lineWidth  = 5
                                                    }
       drawLine dw redAndThick (10,10) (100,100)
       return True -- everything is OK
   where
    red = Color 65535 0 0
This code is present here. The result:
→ You can see all functions related to Graphics Contexts in the following modules:
Graphics.UI.Gtk.Gdk.GC
It might sometimes be useful to react to mouse clicks when they happen. A common case is that you want to react to mouse clicks on a canvas.
To add an instruction that should happen when the user clicks on a widget, say:
can `onButtonPress` mouseClick can
Here, we still have to implement the function mouseClick. (See below for an example.)
To ask a widget where the mouse pointer is currently, we can say:
p <- widgetGetPointer can
Here, p will be a point (a pair of numbers).
A complete example:
  main :: IO ()
  main =
    do initGUI
       win <- windowNew
       windowSetTitle win "My Title"
       win `onDestroy` mainQuit

       can <- drawingAreaNew
       can `onSizeRequest` return (Requisition 500 300)
       can `onButtonPress` mouseClick can

       containerAdd win can
       widgetShowAll win
       mainGUI

  mouseClick :: DrawingArea -> event -> IO Bool
  mouseClick can _evt =
    do p <- widgetGetPointer can
       putStrLn ("clicked: " ++ show p)
       return True -- everything is OK
This code is present here. The result:

→ You can see all functions related to Widgets in the following module:
Graphics.UI.Gtk.Abstract.Widget
| 2009-10-09, Author: Koen Lindström Claessen |