Using the Colab service
Colaboratory (Colab) is a free cloud service provided by Google. It allows users to carry out small-scale deep learning experiments using an interface similar to Jupyter Notebooks. The main reason for using Colab instead of running code on your own machine is that Colab gives you free access to GPUs.
There are a number of descriptions of Colab, including the official tutorial. This document provides a brief introduction, highlighting some things that might not be immediately obvious from the Colab documentation.
Getting started
To use Colab, you need a Google Drive account.
Now, go to Colab and you will see a file chooser. Select New Python 3 Notebook and a new notebook will be created.
If this is the first time you're using Colab with this account, a directory called Colab Notebooks will be created in your Drive account. In addition, Drive will add the option to create new Colab notebooks, as in the screenshot below:
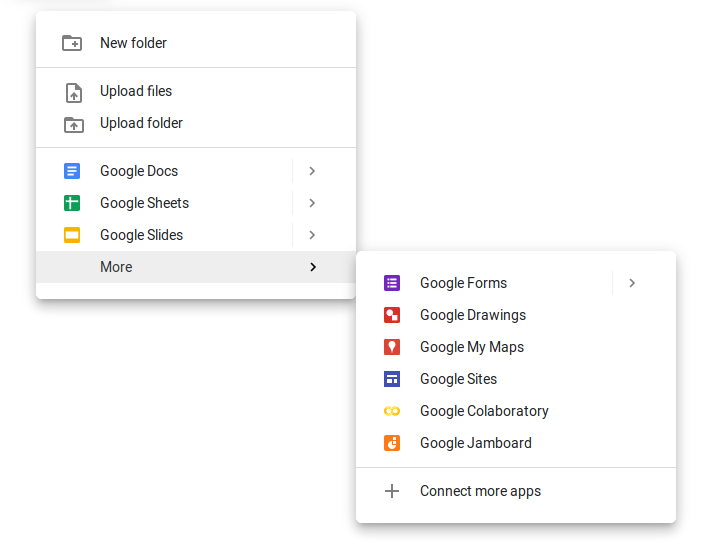
You can either create notebooks from scratch, or upload Jupyter
notebooks (.ipynb files) that you then open in Colab.
Notebooks are stored in your Drive account, but you can also save them to a GitHub repository. The notebooks can be shared openly or to specific users, as with other types of resources in Drive such as Google Docs.
Working with Colab notebooks
Colab uses an interactive working style similar to Jupyter notebook, where Python code is organized into cells that are executed separately.

The user interface has some small differences compared to Jupyter, including the default keyboard shortcuts. However, the "shift-enter" key is used in both environments to execute the current cell and move to the next cell.
Typically, the first thing you will do after creating a notebook is to switch to a GPU environment. You do this by selecting Change runtime type in the Runtime menu. Then select GPU under Hardware accelerator and then Save.

This will only need to be done once: if you reset the notebook or reopen it later, the runtime type will still be set to GPU.
After selecting a GPU environment, you can run your deep learning models using reasonably a efficient GPU, which for most types of models will be faster than running on the CPU on your own machine.
Note: Colab is intended for small-scale projects and will automatically terminate long-running jobs (typically if they run for several hours). If you train very large models, it is best to save them periodically during training.
The Linux environment and the local file system
The Colab notebook is executed by a virtual machine that
runs Ubuntu Linux, and you can execute Linux shell commands in the
notebook cells by prefixing the ! sign.
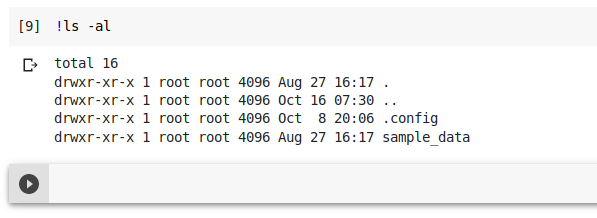
You are a root user on this virtual machine and can install new software if necessary.
The Linux environment running the notebook uses a local storage. It is important to understand that this storage is temporary and will be deleted if the notebook is inactive for some time (typically some minutes). In practice, this file system is used to store temporary files if at all.
Mounting a Drive file system
Because the local storage is temporary, you will need a place to store files in a more stable way. This can include datasets that you need for training, as well as the model files that you save after training. The solution is to connect your notebook to your Drive account. This is unfortunately slightly clumsy, and please let me know if you're aware of a more practical solution.
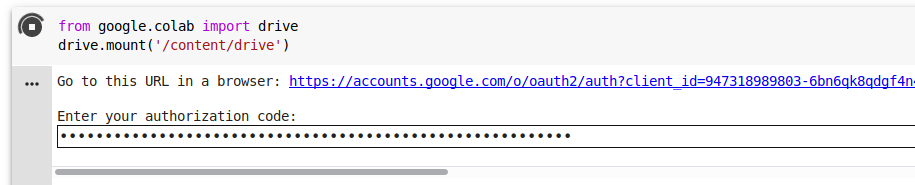
You can connect your notebook to your Drive account by running the following code in a notebook cell:
from google.colab import drive
drive.mount('/content/drive')
Running this code will ask you to authenticate. When you have confirmed that Colab can access your Drive account, you will receive an authorization code that you have to paste into a text field, as in the example below:
Your Drive files are now available to the Colab runtime, and is
mounted in the Linux file system under /content/drive.
For example, let's assume that we have uploaded a
file training_data.csv into the folder Colab
Notebooks in the Drive account. Then this file can be
accessed using the path
/content/drive/My Drive/Colab Notebooks/training_data.csv
By default, the notebook is executing in the /content
directory, so you can skip this prefix if you want.
The connection to your Drive account will be closed if the notebook is inactive.
Available Python libraries
By default, the virtual machine running your Colab notebook comes with a wide range of Python libriaries available, including the most important libraries we have mentioned in this course such as PyTorch, torchtext, and gensim. It also includes the well-known SpaCy NLP library as well as standard data science libraries such as Pandas, scikit-learn, NumPy, matplotlib, etc.
You can also install additional Python libraries. For instance, if you'd
like to install
PyTorch
Lightning to reduce the amount of boilerplate PyTorch code,
you can execute pip as a shell command:
!pip install pytorch-lightning
Note: libraries installed using pip reside in
the virtual machine's local storage, which means that they will
need to be reinstalled after the notebook has been inactive for some time.