
This tutorial is intended to give an hint about how to use JUnit in the Eclipse framework. The seamless integration of tools makes a user more keen to adopt them in his or her development work.
If you have installed Eclipse for Java Developers (or Java EE) the JUnit plugin should already be installed. Otherwise you can obtain it by installing JDT via Software Updates.
Suppose you developed a class called MyClass. It has a method search that takes an array and an integer. Informally, the specification of such method should be something like
At this point, you would like to write some tests for your class. A very tempting way to do it is either to write a main method in the same class and trying to write some tests to exercise it.
This approach can be good if you are writing a one-class work for school, but it is a definitely deleterious approach if you are either building a complex program with big and many classes or if you are working together with other people. It is not economical in the long run: it bloats your code and soon you will not even remember what the tests were about as your work evolves.
You will probably leave that parts of your code rotting.
Altough - as you probably saw during the lessons - testing cannot prove the correctness of your methods, you will have to write down some tests to see if everything is working fine. So tests have to be mantainable entities in your project.
A test case can then be created. In Eclipse, you create a JUnit test case by selecting in the main window menubar File -> New -> JUnit Test Case.
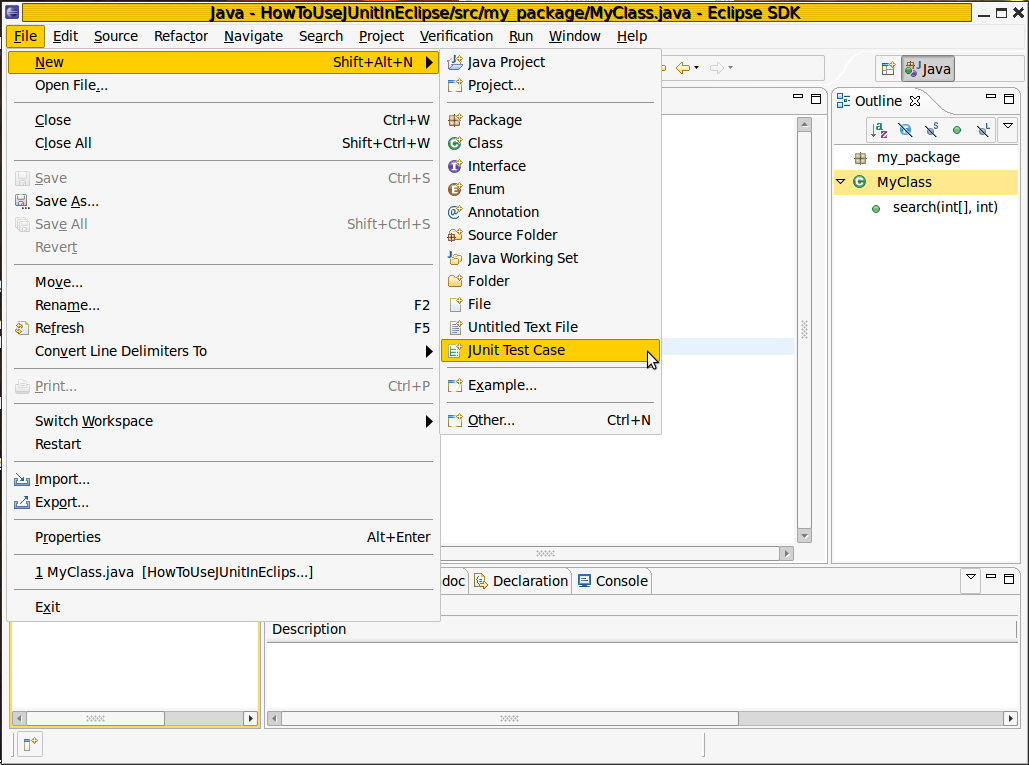
Once you clicked on the item, a big dialog should pop out.
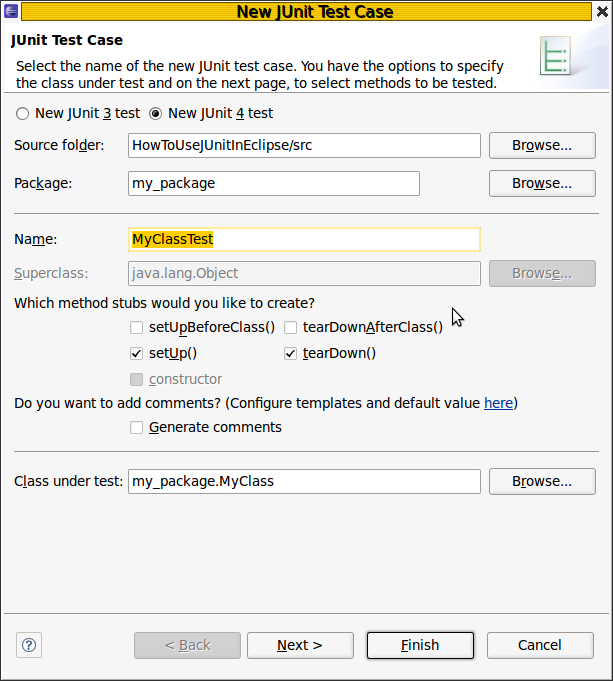
In the pop up you can choose the JUnit version (4 is the one we use) and the package and class name of your test case.
Furthermore, you can tell Eclipse to write method stubs for setting up and tearing down the state in which you want the tests to execute, and specify which class to create the test case for.
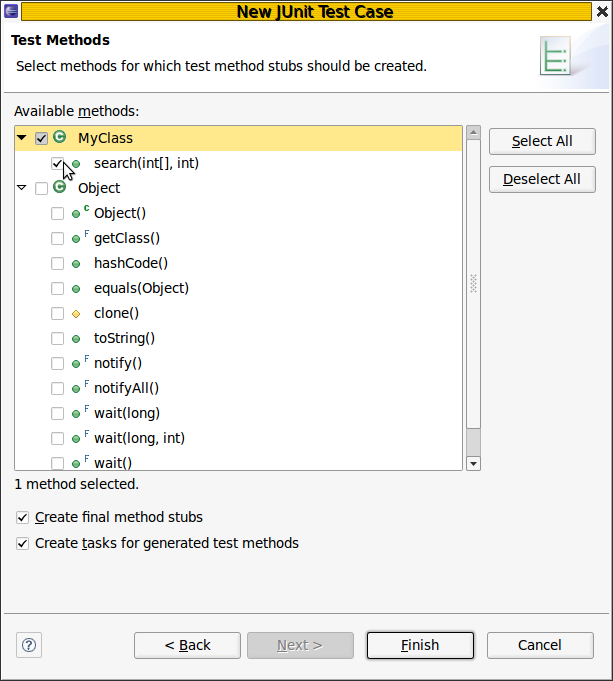
Pressing Next leads to another view of a check-box list in which you can choose methods for which method stubs will be generated.
The box "Create final method stubs", if checked, declares the stubs final.
The box "Create tasks for generated test methods", if checked, is useful if you are keeping track of tasks you are planning to do on your code. Practically, it just adds a comment //TODO in your method, which are then processed by Eclipse. Nothing more.
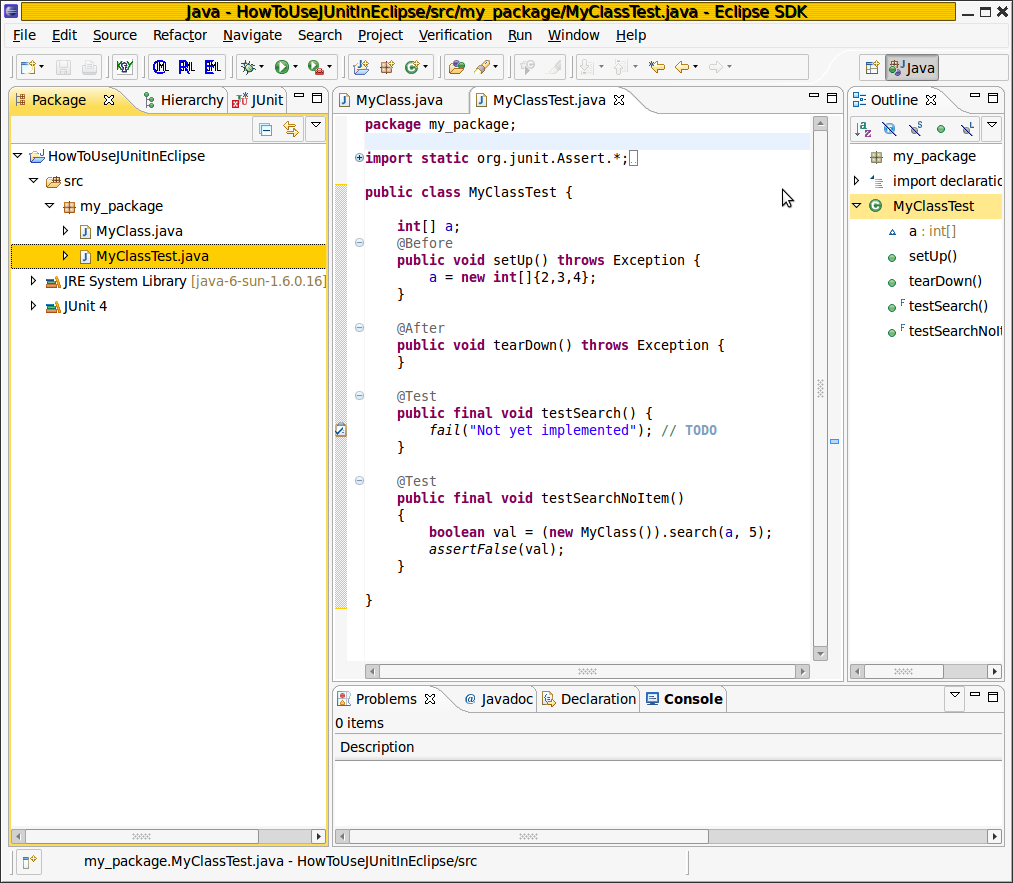
The following image shows what you should get from the generation (Depending on the checkboxes you selected, you could have different things in the code.)
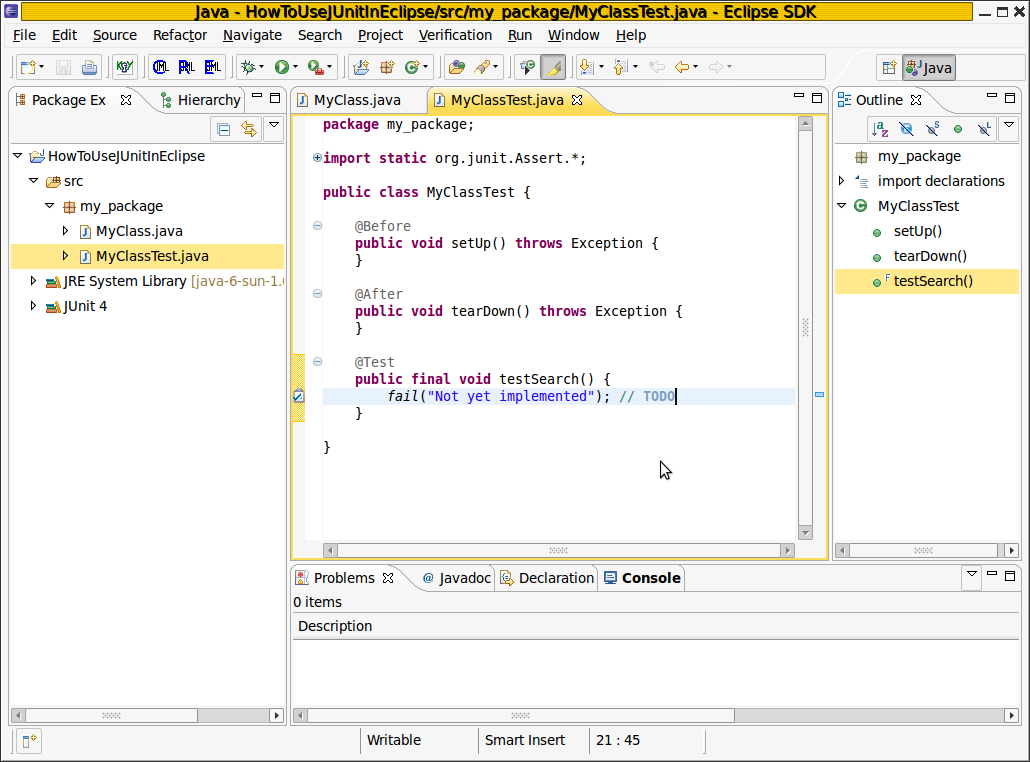
Each test method is decorated with the annotation @Test . All methods decorated in such a way are executed behind the scenes by JUnit.
The methods annotated with @Before and @After are fixtures, that is, they build the initial state in which you want the test to run from. In this case, the array a is initialized.
The testSearch is composed of a method call, fail, that makes the test fail, no matter what.
The testSearchNoItem is an example in which is checked if the method search returnes false (as we expect) if invoked with arguments a and 5.
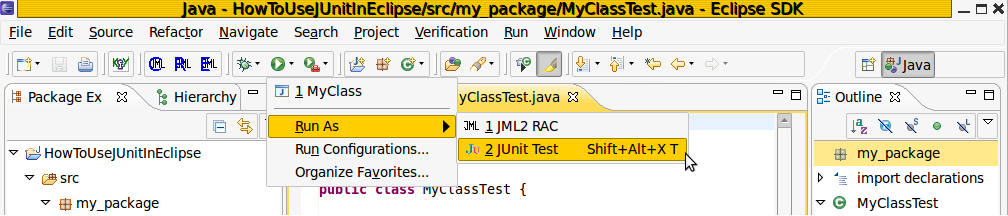
Running the test case is just some click far. On the run command button, press the drop-down button and proceed as depicted in the following picture:
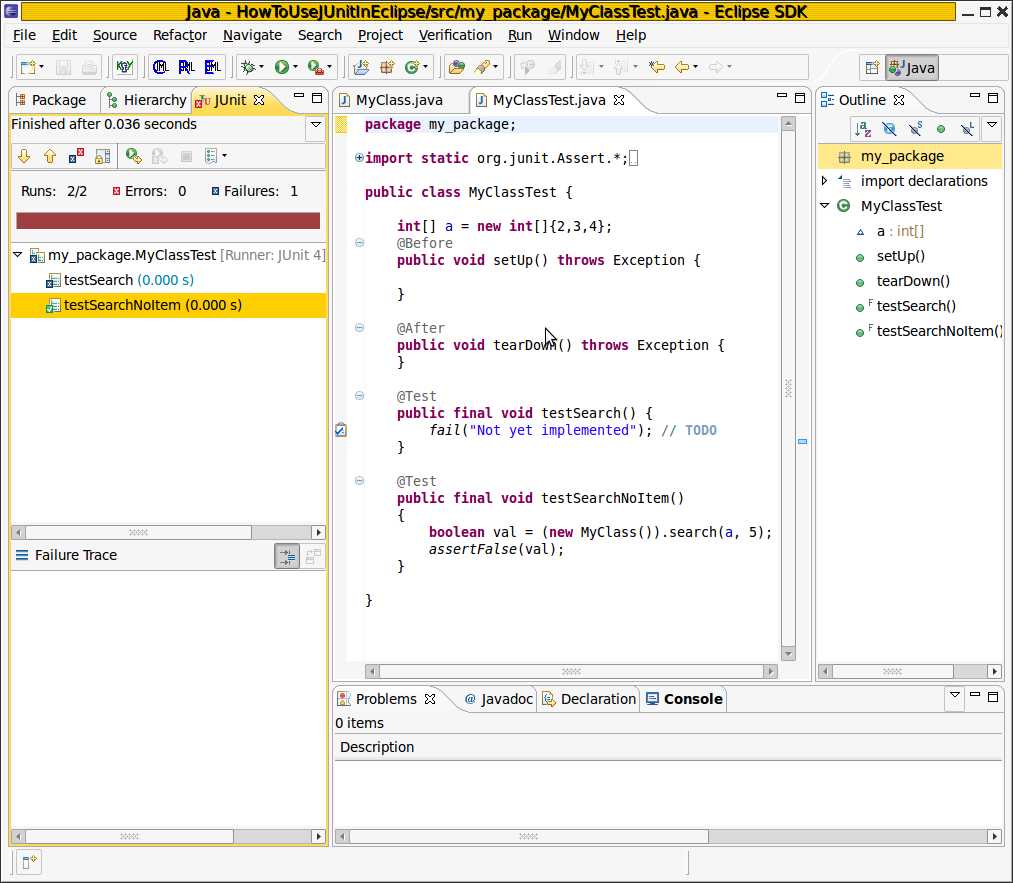
A tab with title JUNIT will appear somewhere in your GUI, most likely on the right if you did not customize your Eclipse environment.
It will show a list of tests, together with the failure trace associated to each test run. As expected, the testSearch method failed, and the testSearchNoItem fulfilled the assertion.
Exercise: can you write down a test case to show that the method does not fullfill the specification given?