In this lab, we will again do digital transformation of data: this time it is pictures. Again, you will have the backbone of a program and you will complement it with a couple of small classes. The amount of code you are writing is again not a lot.
Start by downloading lab5.zip to you working directory; unpacking provides a directory lab5 with a number of files, so it is advisable that you download the zip file to your course directory.
Compile all the java files (javac *.java). Start the program
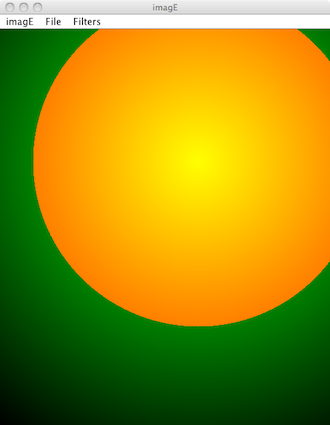
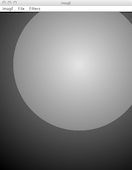
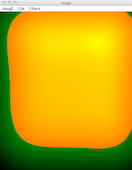
java Main (no command line arguments). The following window appears:
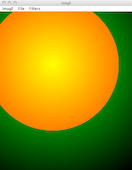
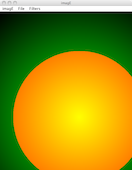
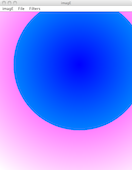
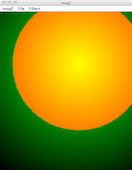
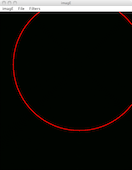
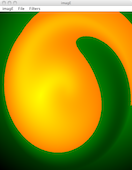
This is a simple program to manipulate images, using different filters. The bulk of the application window shows the initial image. The interaction with the program is through the three menus at the top. The Image menu offers two options: "About" to show the information box about the program, or "Quit" to simply terminate it. The File menu makes it possible to load a new image or save the existing one. The most interesting menu is the Filter menu. There are a number of ways to filter an already loaded image. The result from using the different filters is shown in the pictures below:
We urge you to experiment a little with the program. Example pictures are included in the zip file. It is also possible to use your own pictures in JPEG format.
A digital image is a rectangular array of pixels. Each pixel is described as intensity in the three color components: red, green and blue. These intensities are integers in the range 0 to 255 (eight bits). A pixel's color is thus described completely by an RGB value, consisting of the three integers. Some examples of the colors are:
| Color | RGB value | Color | RGB value |
|---|---|---|---|
| Black | (0,0,0) | White | (255,255,255) |
| Red | (255,0,0) | Cyan | (0,255,255) |
| Green | (0,255,0) | Magenta | (255,0,255) |
| Blue | (0,0,255) | Yellow | (255,255,0) |
This means that in a program we can represent an image with a variable of type int[][][], i.e. an array with three indices. An image with width WIDTH pixels and height HEIGHT pixels can be represented with an array created as:
int[][][] imArray = new int[WIDTH][HEIGHT][3];
To clarify further: the integer imArray[37][124][1] represents the intensity of green in the pixel that is 37 pixels to the right and 124 pixels down from the top left corner (this corner is the origin of the image coordinate system).
How to fill in your array with a picture? One possibility is to create a completely artificial picture in a nested for-loop which fills in the matrix:
for (int x = 0; x < imArray.length, x++) {
    for (int y = 0; y < imArray[x].length, y++) {
        imArray[x][y][0] = ...
        imArray[x][y][1] = ...
        imArray[x][y][2] = ...
    }
}
This is the way in which the initial image is created in the program (in the method initialImage in the class ImagEFrame) where different colors are chosen depending on the distance from the pixel (300,200).
The normal way to create an image, however, is to load it from a file in JPEG format: this file was, in turn, likely created by a digital camera. There is a support in the Java standard library for reading and writing JPEG files by using the standard Java class BufferedImage. Pictures represented with this class can in turn be shown in a Java program.
A BufferedImage is "almost" like the array that we described above. It differs in two important ways:
int getRGB(int x, int y)BufferedImage in a sense is a model class for images, similar to the model classes in the Game of Life and the histogram.
The class Conversions takes care of the translation in both directions between BufferedImage and int[][][] by using methods image2Matrix and matrix2Image.
If you have experimented with the program then you have seen different ways to manipulate, or filter, an image. Here is a brief description of the various filters.
These filters implement the interface ImageFilter:
public interface ImageFilter {
    public String getMenuName();
    public void apply(int[][][] src, int[][][] dest);
}
The method apply applies the filter on the image src and stores the result in dest. Both arrays are assumed to be already created and of equal size.
These filters implement the interface ScalableFilter. It is different from ImageFilter because apply takes an additional parameter that specifies "how much" filtering should be applied:
public interface ScalableFilter {
    public String getMenuName();
    public void apply(int[][][] src, int[][][] dest, double scale);
}
The parameter scale is assumed to be between -1 and 1. When you select one of these filters there will be a new component in the user interface, a JSlider, with which the user can specify the desired parameter.
The two given filters of this type are both designed to distort the image and achieve interesting effects. It is not important for this lab to understand how these filters work: we therefore give the descriptions on a separate page.
You are to implement two new filters and add them to the program.
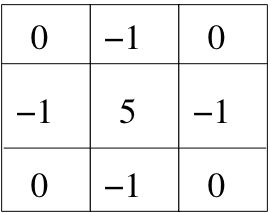
First, you define a filter to increase the sharpness of an image. This should be done in the form of a class SharpFilter, which implements ImageFilter. This filter is an example of the so called convolution filters. Consider first only the red component. The red component for pixel (x, y) in dest is calculated from the red components in (x, y) and its nearest neighbors in src. We multiply the red component in (x, y) with 5 and subtracts the corresponding components of the four pixels to the right , left, above and bellow (x, y). The result is the red component for (x, y) in dest . The filter is often described by the following picture, which shows the current pixel (center) and its neighbors, and the proportion with which they contribute to the result:
One problem remains: the result can be negative or greater than 255. We need to check this and set the red component in (x, y) to 0 in the former case and to 255 of the latter case. The same transformation is then made for the other two color components.
This calculation cannot be performed for the pixels along the edge of the picture: these are therefore left unchanged (i.e. have the same values in dest as in src).
After you defined the class SharpFilter you have to add it to the program. This requires adding a single line to ImagEFrame.java; by looking at how the other filters are added. It should not be hard to make this addition.
Your implementation of the filter is tested better on the portraits included in the zip file. The picture of Angela Merkel in the original is somewhat blurry and it could be improved, while sharpening the image of Barack Obama definitely goes too far.
Finally we note that many common filters can be described as convolution filters by replacing the above matrix with other matrices. The Sobel filter consists mainly of two such filters. Those interested can find many more examples by searching online.
A filter by parameter needs not be as complicated as Swirl and Square. You will now implement a filter that can make the image lighter or darker. The extra parameter scale determines how much brighter or darker it will be. The maximum value scale = 1 will increase all three components in all pixels with 128 - but of course, with the constraint that the result must not be larger than 255. The minimum value scale = -1 must reduce all three components with 128 - but they may not be negative. Values of scale in between will increase/decrease the brightness. For this filter, as well as Swirl and Square, it is thus that scale = 0 leaves the image unchanged. The new class, tentatively called BrightnessFilter, will implement ScalableFilter and must be added to the program.
Once you have done this, you are done with lab 5. This time you submit your files in the FIRE system for correction. Select Lab 5, press Add File and then Choose file. A file browser will open and you can select a file for upload. For reviewing you should upload three files in Fire: your two filter files and the changed ImagEFrame.java. Only after that you press the Submit button. Note also that in this and the next lab we mark if you have made the voluntary task below.
When you have experimented with the program, you have probably noticed a serious flaw - you can not undo a filter. Some filtrations can be undone by having an inverse; Flip Horizontal, Flip Vertical and Invert are all their own inverses, but Detect Edges or Black and White has no inverses. In the optional task you should at least partially remedy this as follows:
Add a new menu option Undo to the Filter menu. By choosing this option after a filtration is done, the filtering is undone, i.e. the image before filtering must appear. However, it does not allow the user to do more than one Undo - operations. This limitation makes the supplement very easy because the old image still remains accessible to the application.
Chosing Undo as a filter option when scaling should mean that the picture should be reset to its original state.
When Undo is not possible, i.e. immediately after loading an image, then Undo must appear in the menu as disabled, i.e. with gray text. There is a specific method in the class JMenuItem with which one can set (and remove) this condition.
It should not be more than about twenty lines to implement this functionality. The new code should be in class ImageFrame. A necessary first step is to carefully study the class and try to understand how it works.